X3 Overlapping Zones for Packaging (X3 EN)
Table of Contents
1. How overlapping zones work
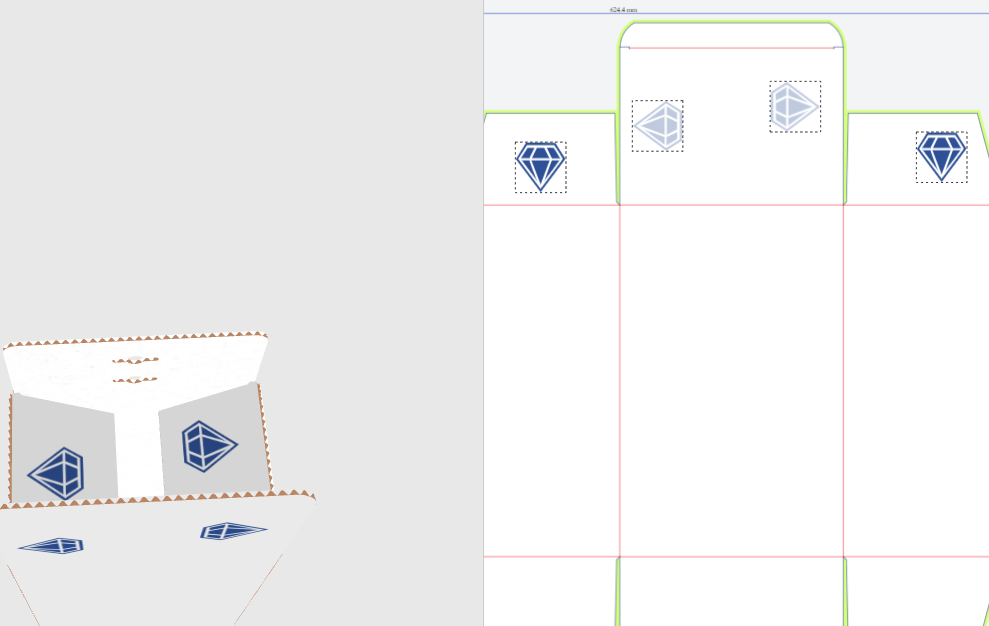
Overlapping zones are predefined zones that can 'clone' an object from one part to the other. In this image the darker diamond shape is cloned onto the zone on its left:
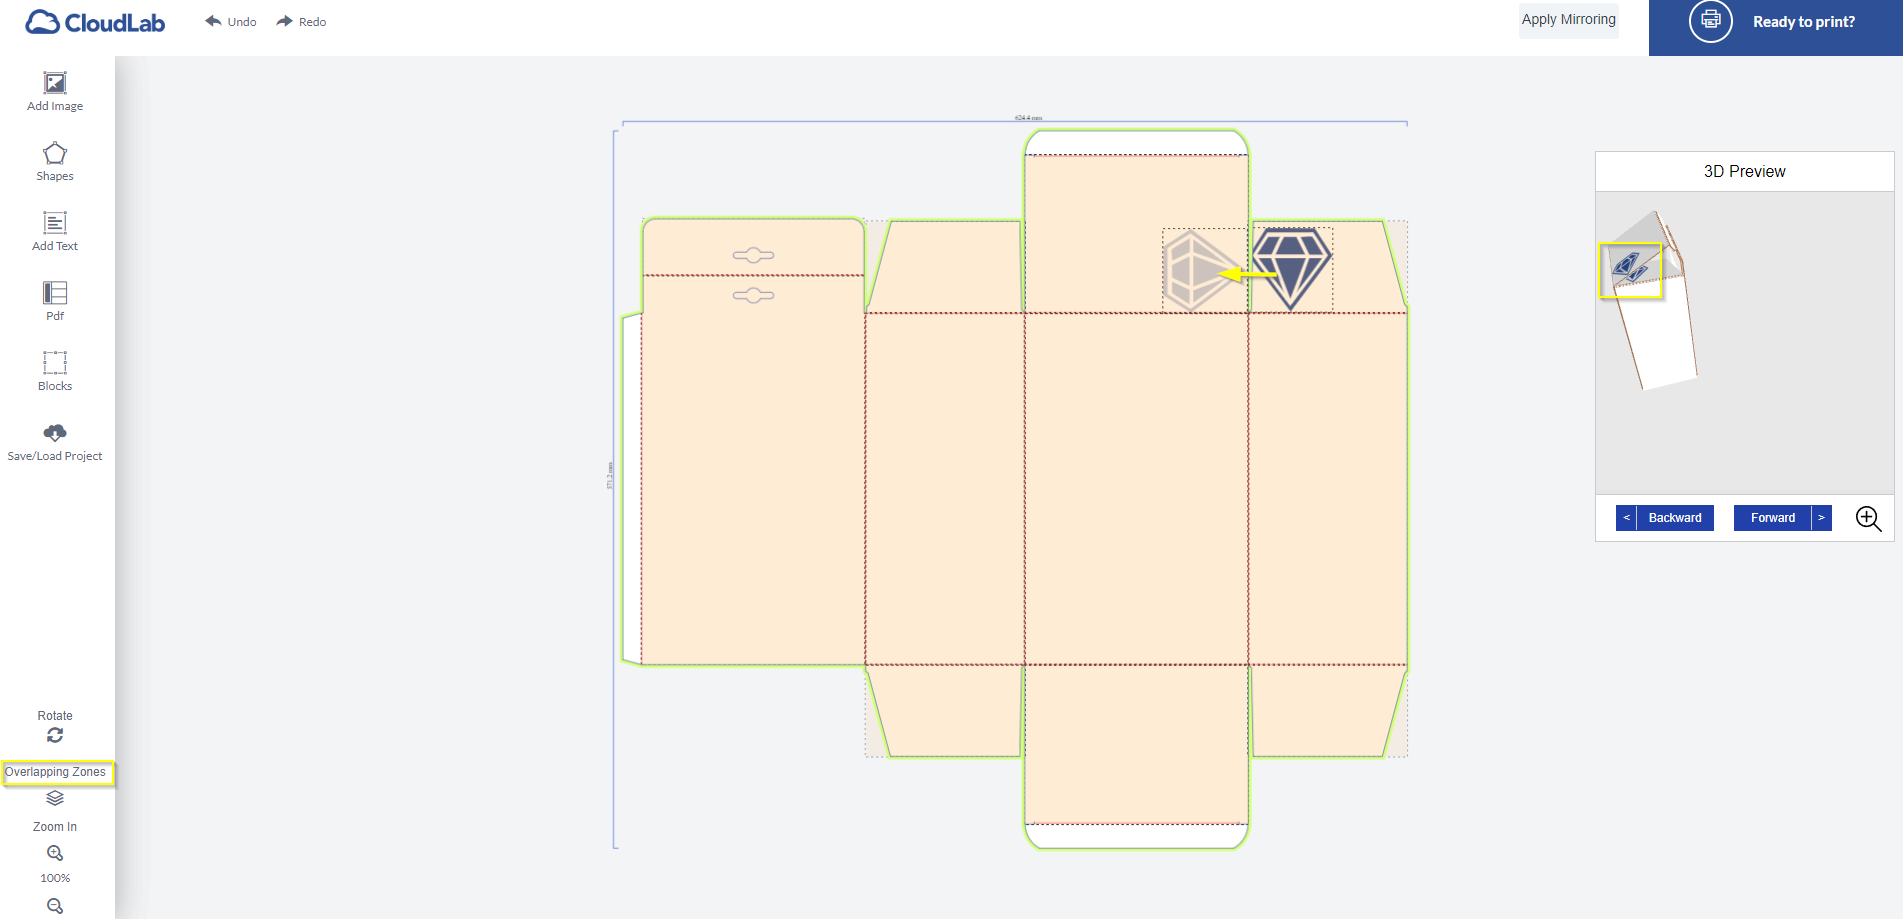
The effect can be seen in the 3D, where the original and clone are exactly superimposed. To achieve this, the zones have to be connected and the 'cloned' areas adjusted/rotated, so the end result has two diamonds that are perfectly aligned in position and orientation.
The cloned object can be a shape, an image or a text.
You can see the overlapping zones by clicking on Overlapping Zones at the bottom left corner of the editor. This way all zones that are connected with one zone or another are marked orange as can be seen in the screenshot.
Not all of these zones are connected with each other though, otherwise all of them would now display a diamond.
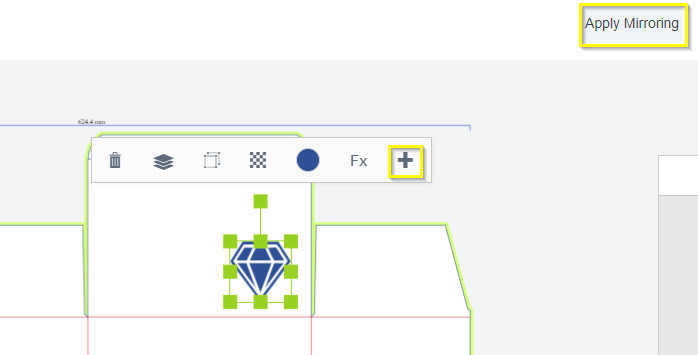
After you have placed an object on the box, you can either click on the + sign of the object’s menu or on the button Apply Mirroring to clone the object to its correspoding zone.
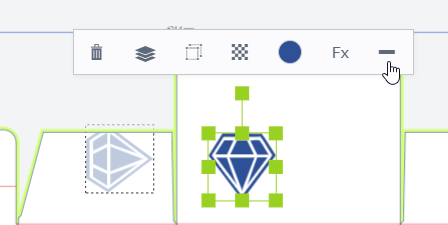
To remove the clones, just click on the - that appears instead of the +:
Please remember to enable the cloning/mirroring effect in the Options tab of your personalization template, otherwise it won’t work:

Important: Please keep in mind that overlapping zones do NOT work when the template gallery is activated.
2. How to add overlapping zones to your packaging model
We will add a few overlapping zones in overlapping_zones and use the D3 Rendering for this:
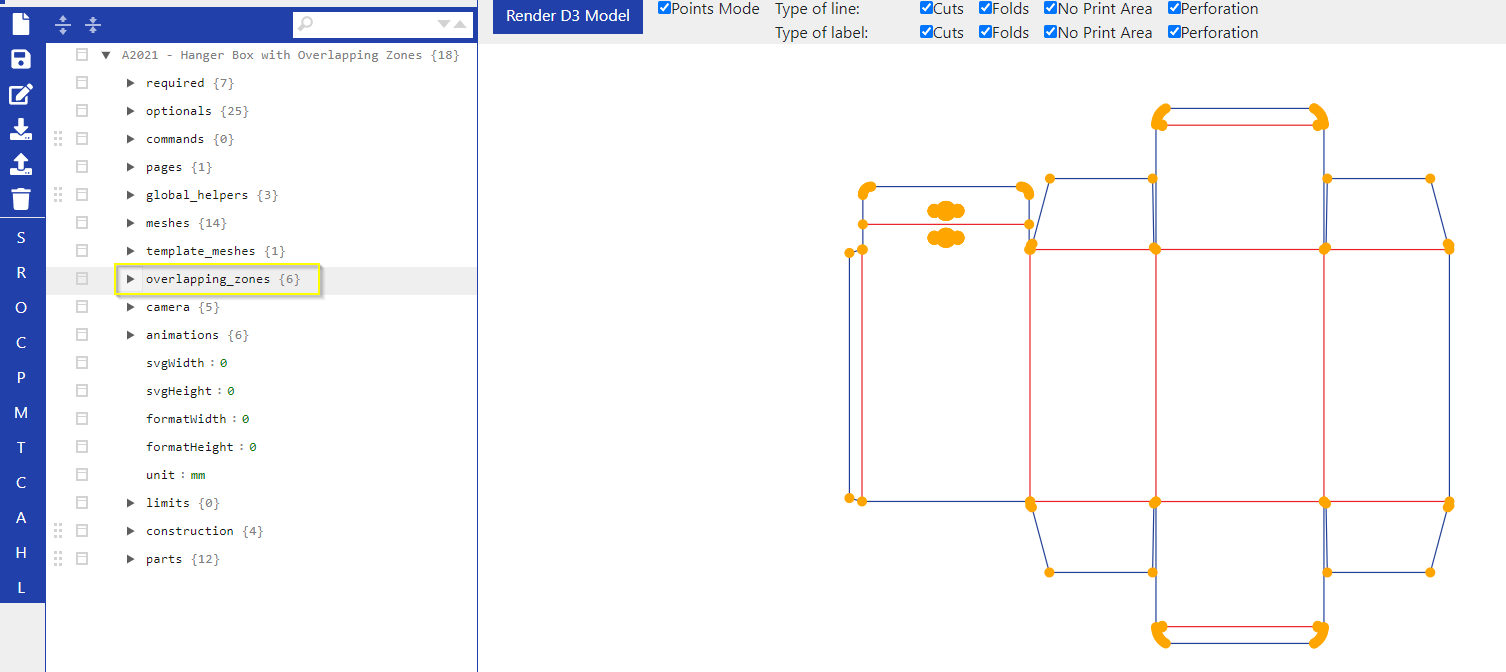
The zones are added in groups, so we will name our first group and Add it:
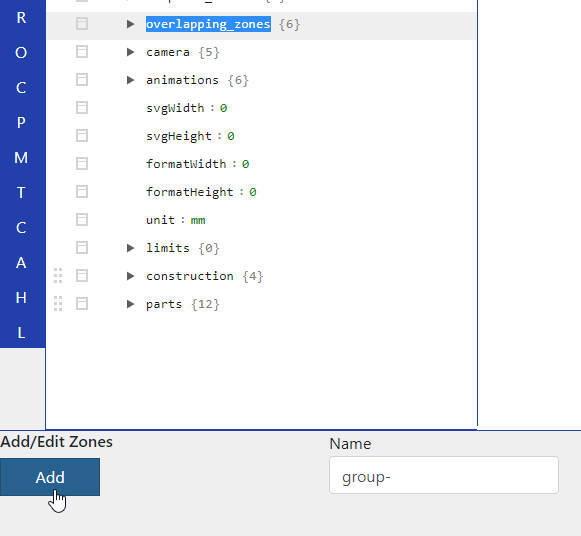
Then we click on Add Template and Add a zone.
Each group has at least two overlapping zones. One zone where you place your object in frontend and the other zone where the object gets cloned to. Which means we need to add a second zone to our first group.
We also have to let the system know where each zone is located, which we will do by recording the points. Select your zone and click on the button Record to start recording:
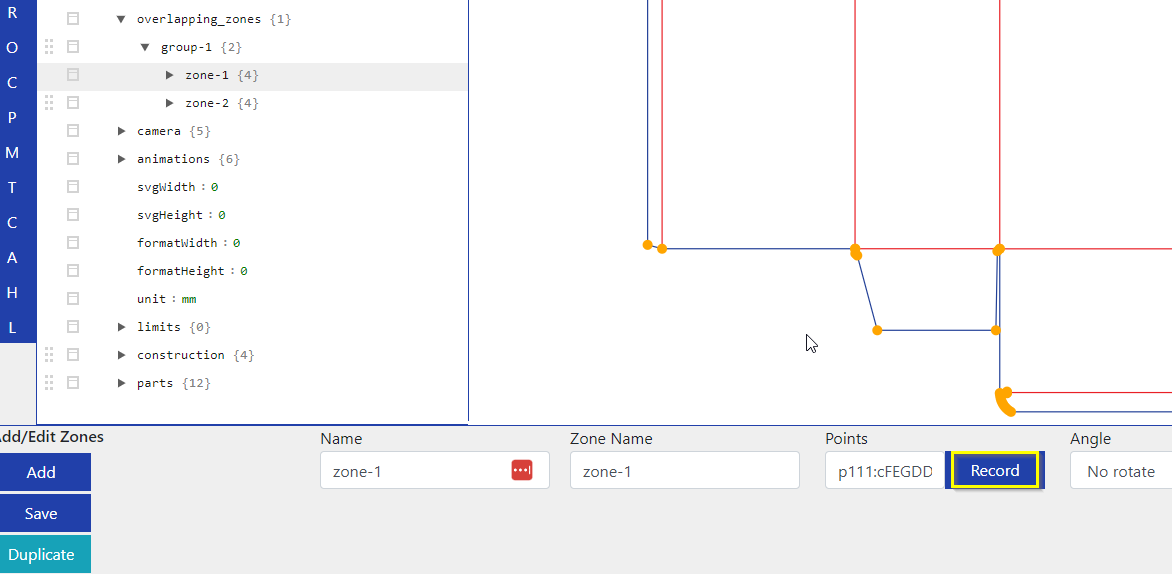
Let’s make the top of the box our first zone. Click on the outermost points of the lid to let the system know where the edges of the zone are. Your selected points will turn from orange to green.
After you are done, click on Stop and Save the zone.
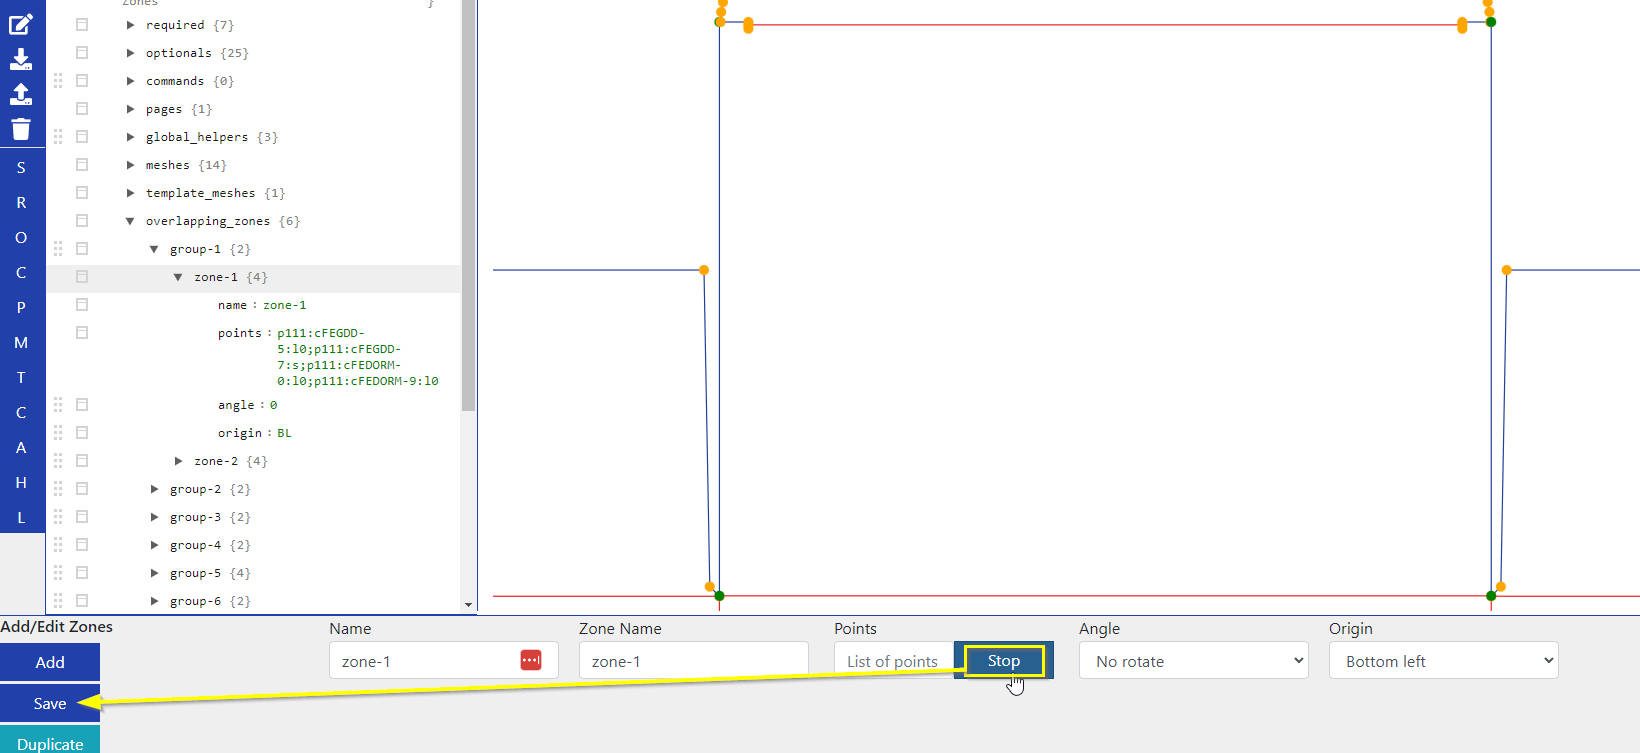
This has to be done to each zone you add. Let’s make the mesh on the left side of the lid our second zone by recording the points and saving the zone:
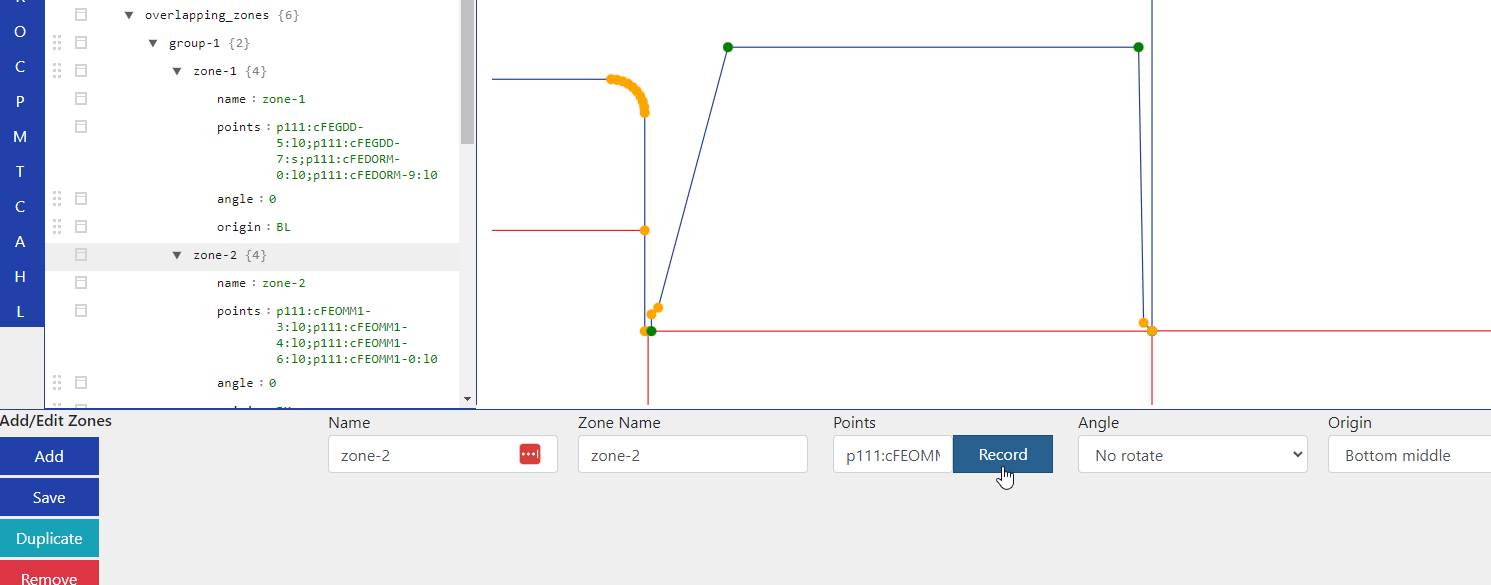
Let’s take a look at the result in the frontend editor:
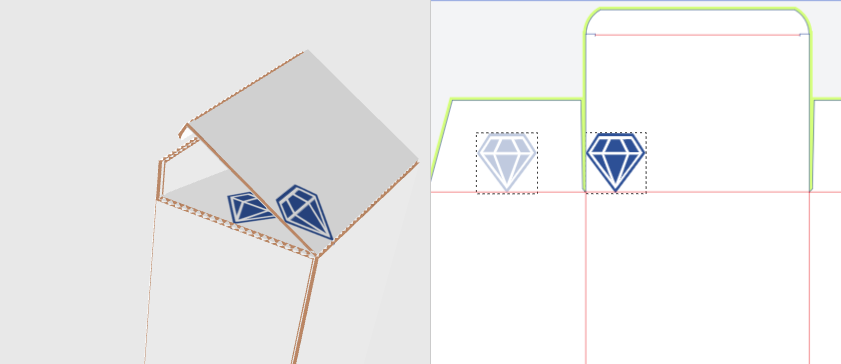
It worked, but as you can see in the 3D, the diamonds are pointing in different directions and they aren’t aligned correctly.
This can be adjusted. The direction of rotation is clockwise, so the clone (let’s say zone-2) has to be rotated by 270°. It also has to stick to the right bottom corner of its zone to be aligned correctly.

The original (zone-1) I have already set to the left bottom corner of its zone. This way the frontend result looks like this:
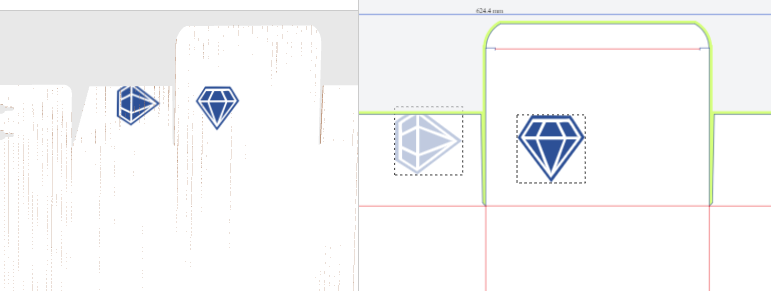
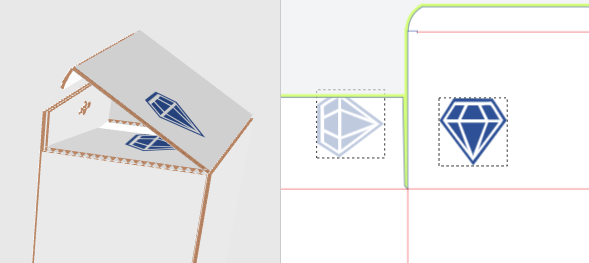
When the box is folded, both diamonds fit perfectly.
Please note that you can also place your object on zone_2 and then clone it to zone_1, the order doesn’t matter:
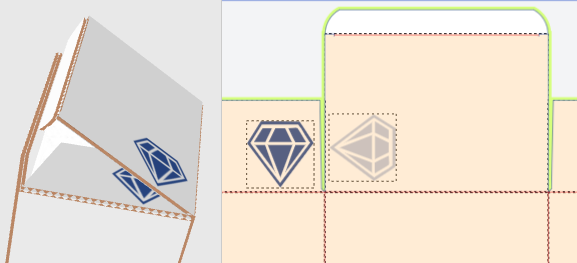
The only difference is the rotation of the shape, but you can adjust it by rotating the “original”. The clone will always follow.
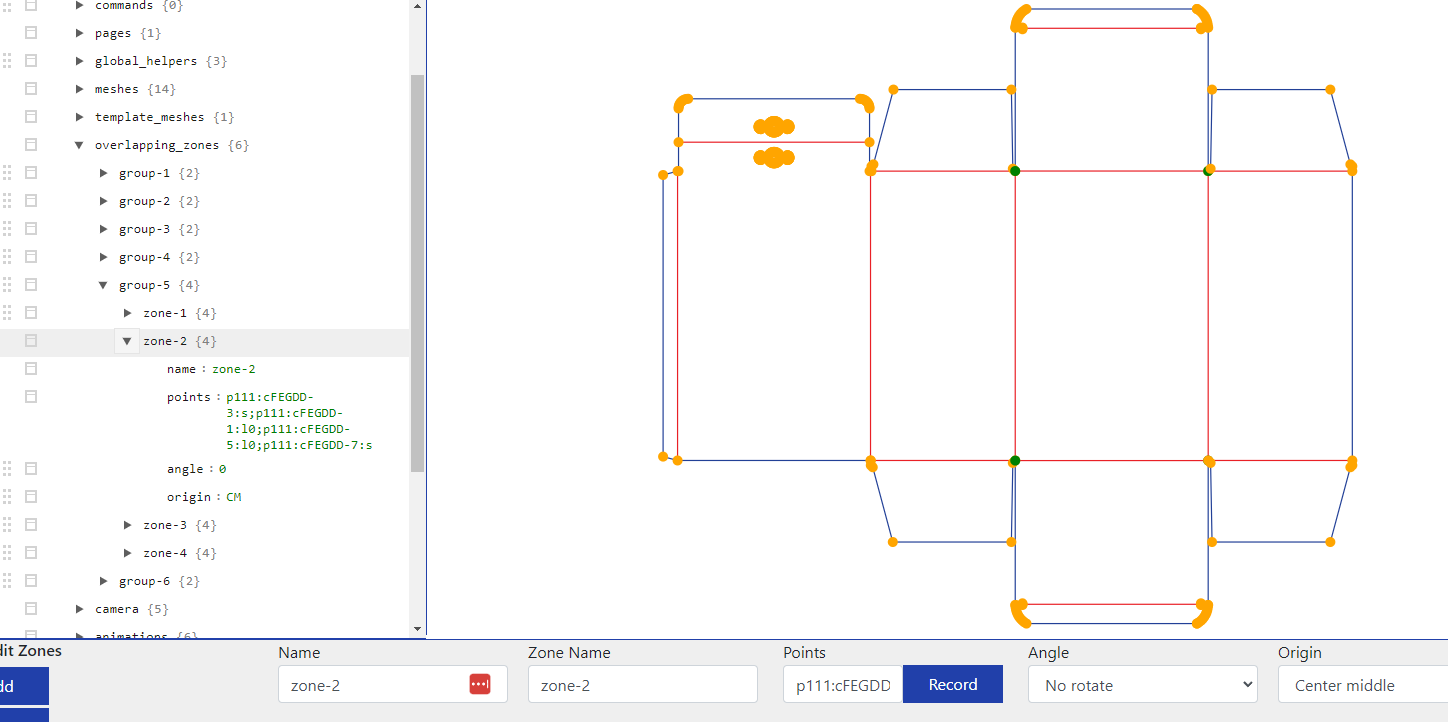
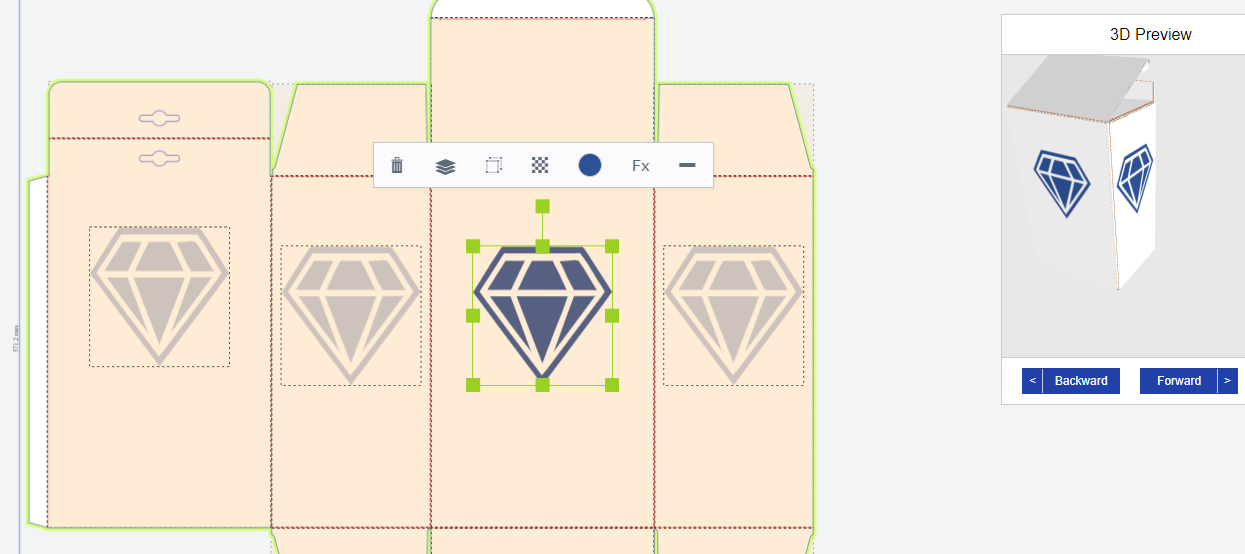
There can be more than two zones in one group. In group 5 for example I have added four zones:
Frontend:
3. Restrictions
Now there are some restrictions to the functionality of overlapping zones.
Since you have to apply an Angle and an Origin to your zones, you could connect the lid to its left and right sides at the same time.
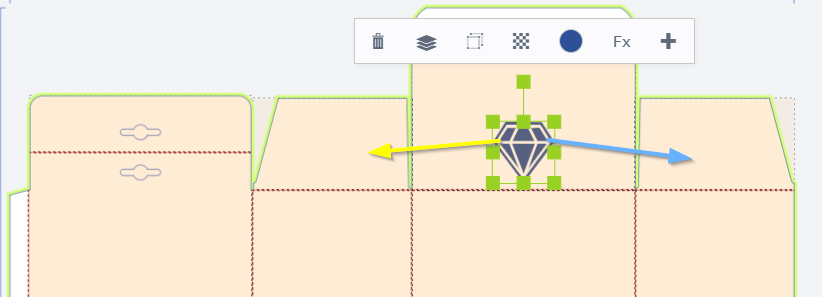
But only one of the sides will be perfectly aligned to the lid’s object, while the other one will always be off.
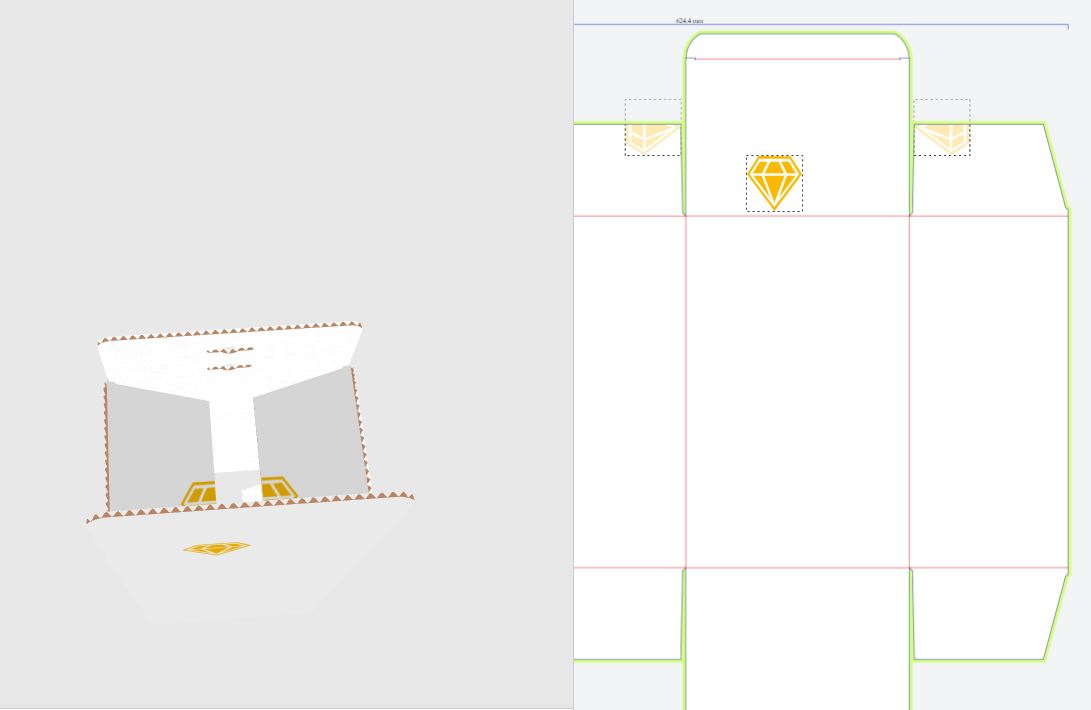
As you can see, the left diamond fits under the original, while the right one is too far to the right. There is currently no way to make both sides fit the middle.
What you can do instead, is to connect both sides to the middle in separate groups and add a diamond on those sides to clone to the middle:
Despite that you can do great things with this feature. Have fun trying it out!
