X3 Edit the postage theme (X3 EN)
PORTO-THEME
General settings for the structure of the store you make in the Settings Panel, basic settings for the design in the Design Panel. We will start with the main options in the Settings Panel.
THE SETTINGS PANEL
The basic theme settings can be configured in Porto > Porto > Settings Panel.
GENERAL
This is where you decide how wide the store should be displayed in the browser window, whether it should have a box border, whether sharing buttons should be displayed, and more. The width of the website in pixels can be selected in Maximum Page Width.
HEADER / FOOTER
If you want to use a „sticky header” that is visible even when scrolling, you can enable this in the „Header”. There are 20 different types available for the header design. Other header settings include displaying flag icons for multiple language variants of the store or enabling/disabling a login popup for customer accounts.
CONFIGURE STATIC BLOCKS
Static blocks are uniquely referenced using identifiers and created by you. The main internal identifiers are:
porto_facebook
porto_footer_information
porto_footer_content
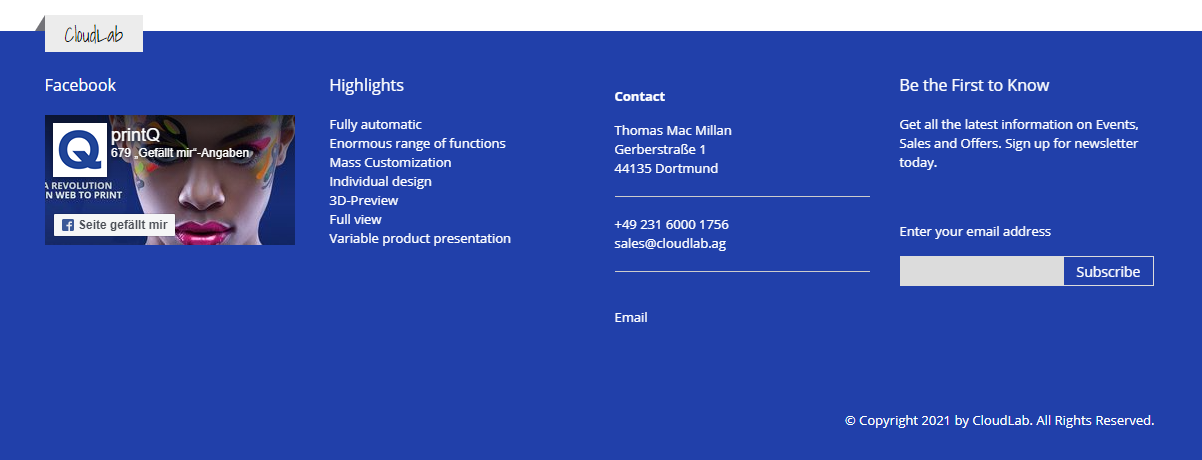
These three identifiers represent the left three of the four blocks below in the screenshot. You configure a new static block in the backend under Postage > Settings Panel > Add Footer. Here you enter the block title and identifier ("Static Block ID"). The block title is an informative description in the backend, while the identifier is used as an internal reference to call the static block. At the bottom of the view, enter the desired content in the editor.

CATEGORY VIEW / PRODUCT VIEW
In the Settings Panel, these sections set how categories and products are displayed in the selection overviews in the store. For this purpose, you can define the width and height of the preview images and set what additional information (ratings, price, links to the wishlist, or other products) should be displayed.
PRODUCT LABEL
Here you can activate that newly added products to the store are automatically marked with a "NEW" label.
CONTACT US
So that your customers know how and where to contact you, it is possible to specify your company address in this section for a Google Maps view, as well as general contact details, e.g. for display in the footer of the page.
THE DESIGN PANEL
Let's continue with the settings in the Design Panel section. This is not about organizing individual store functions, but about the visual aspect of your website. The basic theme design can be configured in Porto > Porto > Design Panel.
GENERAL
Under Theme Colors, the basic color of your personalized version of the Porto theme is set. It will then be enabled by default for certain text fields, background areas, and other elements.
FONT
In addition to the basic color, you can also specify the font used on your page and its size (Basic Font Size). Set these under Font Family > Google Fonts. In addition, make sure to also specify a basic font type under Basic Font Family, because some Google Fonts are not displayed by all browsers. Such browsers will then fall back on the basic font type set here.
COLOR
In addition to the basic theme color, you can set additional colors for specific page elements here.
Modifiable elements include:
Text
Links (including hover color)
Buttons (text, background, and hover color)
Breadcrumbs (text, link, and hover color)
Product labels (text and background color)
HEADER / FOOTER / MAIN CONTENT
If the general options for the header and footer in the Settings Panel are not enough for you, you can further modify these modules as well as the main area of the store here. To do this, set the box in the respective area to "Yes". Then the other options will appear.
You can change the header and footer in a similar way to the elements under Color. The Main Content can be given a background color and/or a background image. In the Custom Style text field, you can also enter your own CSS-Code for more in-depth changes, if required.
