The CloudLab Menu (vers. 6)
INTRODUCTION
On the following pages, we will first present you with an overview of the various printQ functions from the CloudLab menu, before taking a closer look at how to create products.
PERSONALIZATION DATA

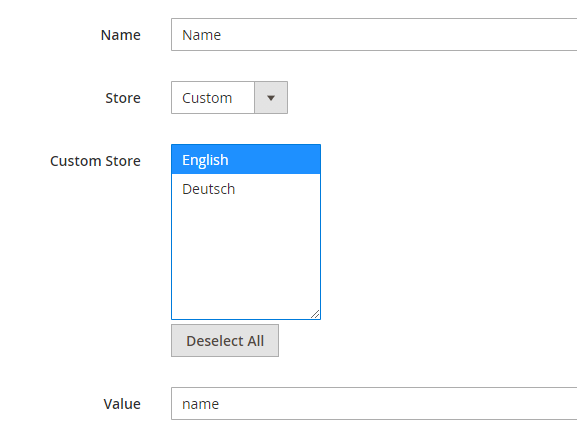
Here you can define variables which can be prefilled by the customer in customer account, as name, address, phone number, or any other necessary value which should appear automatically on their products.
After defining a name you can select if this value is store or store specific. If not it can be also applied for all shops. The Value defined in Value can be referenced in a PDFLib Block or InDesign, using the custom propery Value.
Details can be found in Creating and entering personalization data (vers. 6)
DATA CENTER
Details about the data center can be found in Data Center (vers. 6)
CROSSMEDIA CENTER
For more information please contact our Customer Service
PRODUCTION CENTER MAPPING
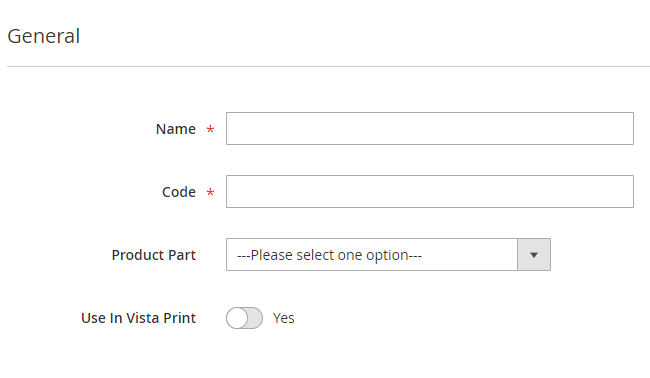
Here you have the possibility to define a separate SKU, which will be available in the production files (JDF) based on each configuration.

For example there is a product with several papers it is possible to create different rules while in each rule a different paper is selected, and the system will use the defined SKU for this configuration.
First you can define a name for your new mapping, and then the code. The selected code will be used as the separate SKU. After that you select the product part which you want to configure.
After defining the name and new SKU you have to set up your configuration. In Product Part Options you can select the information for which the new SKU should be valid.
APPROVAL
Details about the approval workflow can be found in Approval workflow (vers. 6)
PRODUCTION METHODS
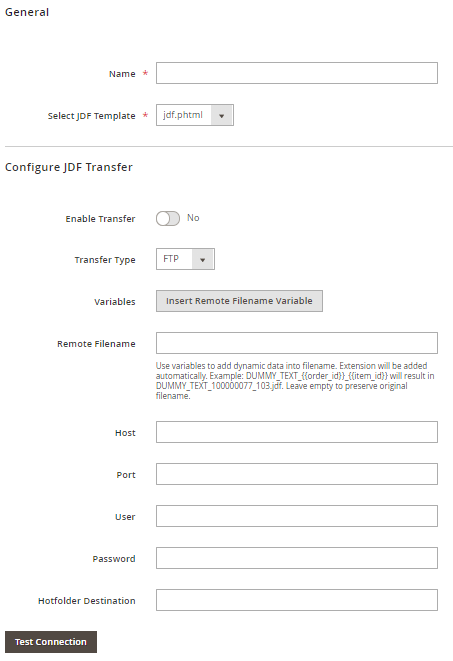
Manage your hotfolders for different print products here, along with the configuration of JDF- and print data transfers and including authentication via host, port, user and password and selection of hotfolder-target folder.
Click on the button „New“ in Production Methods, assign a unique name to your production method and select the respective JDF-template. The templates are deposited on the server in the folder /html/templates/jdf in phtml-format.

In the following input fields you enter access data and the hotfolder-target folder for JDF and print data transfer as well as the transfer type (FTP or SFTP).
By creating various production methods depending on different printing products you ensure high efficiency in the production process and optimum utilization
Please always check whether a connection to the server (“Test Connection“) can be established. Contact our support if this is not the case.
As soon as you have set up all available production methods (there is no limit to the number of methods), you can determine a production method for each printing product in Web2print settings via drop down-menu. During shop operation the normal process will start upon approval (in the approval workflow, if enabled), which is immediately after an order has been placed (closed shop) or after payment has been received (open shop).
SETTINGS
Details about the settings can be found in Magento 2 System settings (vers. 6) > PRINTQ
