X2 Product Parts (Config)
Here you create the Product Parts that hold the components of your products. Product parts can be created both via the backend and via import/export.

Backend

Name
Here you enter the name of your Product Part. This name is also displayed in the frontend and can be changed at any time.
Code
Here you enter the code of the Product Part. The code may not be changed afterward, since this represents the reference within the system. If you change the code you have to re-link everything that was linked to the Product Part.
Stores
Here you decide if the web product is only visible to a specific store view within the data center.
Page Options
Here you select the individual values from the seven Page Options that should be available in your product. Also, make sure that you select a default value as well.
belongs to Product Part
Here you select the name of the print pdf on our server. This is important if you want to create a product that consists of several Product Parts (e.g. a brochure that has a TP for the cover and a TP for the content). In this case, both Product Parts must have a different assignment (e.g. content and cover). You can create new types/names under Web Product → Product Part → Attributes.
Import/Export
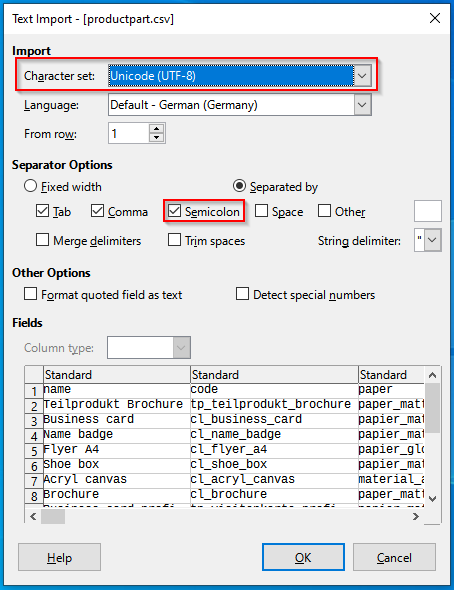
The import/export is done via .csv file. Please note that our .csv must be opened and separated by a semicolon and the character set must be set to UTF-8. If you use Excel, it is best to open the file via the import function.
Alternatively, free alternatives like LibreOffice can help. Here a selection is displayed at the beginning, how the file should be opened.

Codes are then used within the .csv. Fill in the individual fields and import the list again afterward. IMPORTANT: Deleting via import is not possible. If you want to import e.g. a list with only 5 new partial products, this is possible without any risk.

