X2 Create a subtheme (Magento 2 and Datacenter)
Magento 2 and printQ x1 offer you the possibility to use an individual subtheme for each store. This offers the possibility to customize the stores individually to separate them from each other design-wise.
The creation of a subthemes is done in 3 steps:
1. Create a subtheme on the server (only needed for Magento 2).
First you have to create a new folder for the subtheme on the FTP server. For this we recommend to use this example folder and change it accordingly:
Then place the folder in the "app/design/frontend/Smartwave" folder. Smartwave is the vendor of the Porto theme. So if you are using a different theme, please use this folder.
Next, you need to make the following changes:
The name of the folder is the name of your subtheme (e.g. customershop2). Therefore change it as you like. Allowed are A-Z, a-z, 0-9
In the folder you will find the file "registration.php". Open it with an editor of your choice (e.g. notepad++) and change the 4 line. Here the path must be changed by the name of the subthemes you set. Example:Original: 'frontend/Smartwave/subtheme_example', Changed: 'frontend/Smartwave/CustomerShop2',
The last thing to do is to modify the theme.xml file. Here you need to enter the name of the parent theme (line 3, <parent> tag). The subtheme will pull all files, which are not present in the subtheme itself, from this theme. If you don't want to use a special parent theme, you can leave the file as it is.
2. Select subtheme in Magento
After the folder has been saved on the server and all changes have been made, the subtheme must be selected for the corresponding Magentoshop. To do this, go to the menu "Content → Design → Configuration" in the Magento backend and select the website/shop for which the new subtheme is intended.
On the page that opens, you can now select the subtheme from the dropdown menu:

Save the settings and clear the magento cache anfter you are done.
3. Subtheme for printQ/packQ (editor and product page)
Für printQ gibt es zwei verschiedene Subthemes. Sowohl die Editoren selbst als auch die Produktseiten, können ein eigenes Subtheme nutzen, welche allerdings komplett im Datacenter angelegt werden.
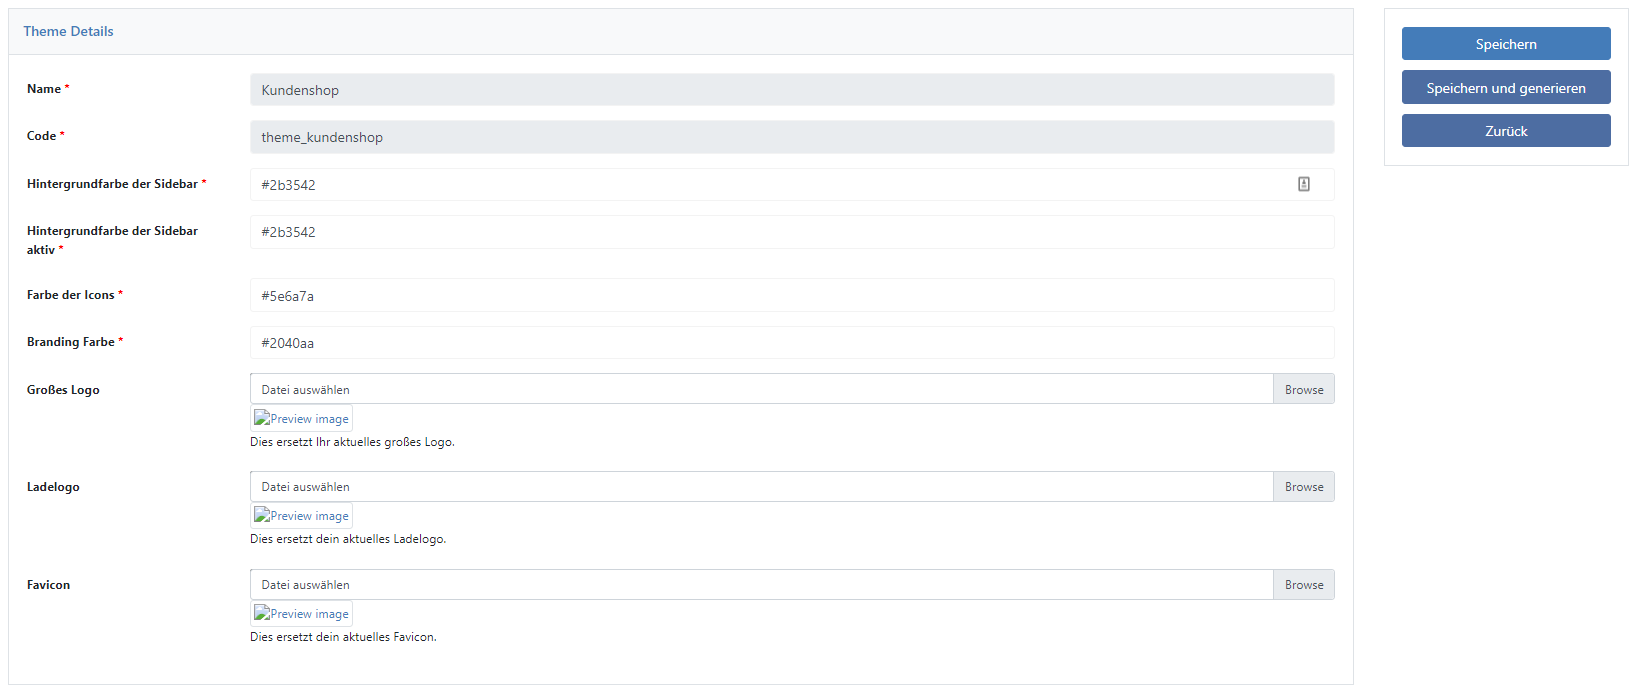
Editor Subtheme: In the Data Center, navigate to the "Personalization → Themes" menu. Now click on "Duplicate" one of the already existing themes. In the window that opens, you can now edit the theme (change colors and logos) and assign the name and code.

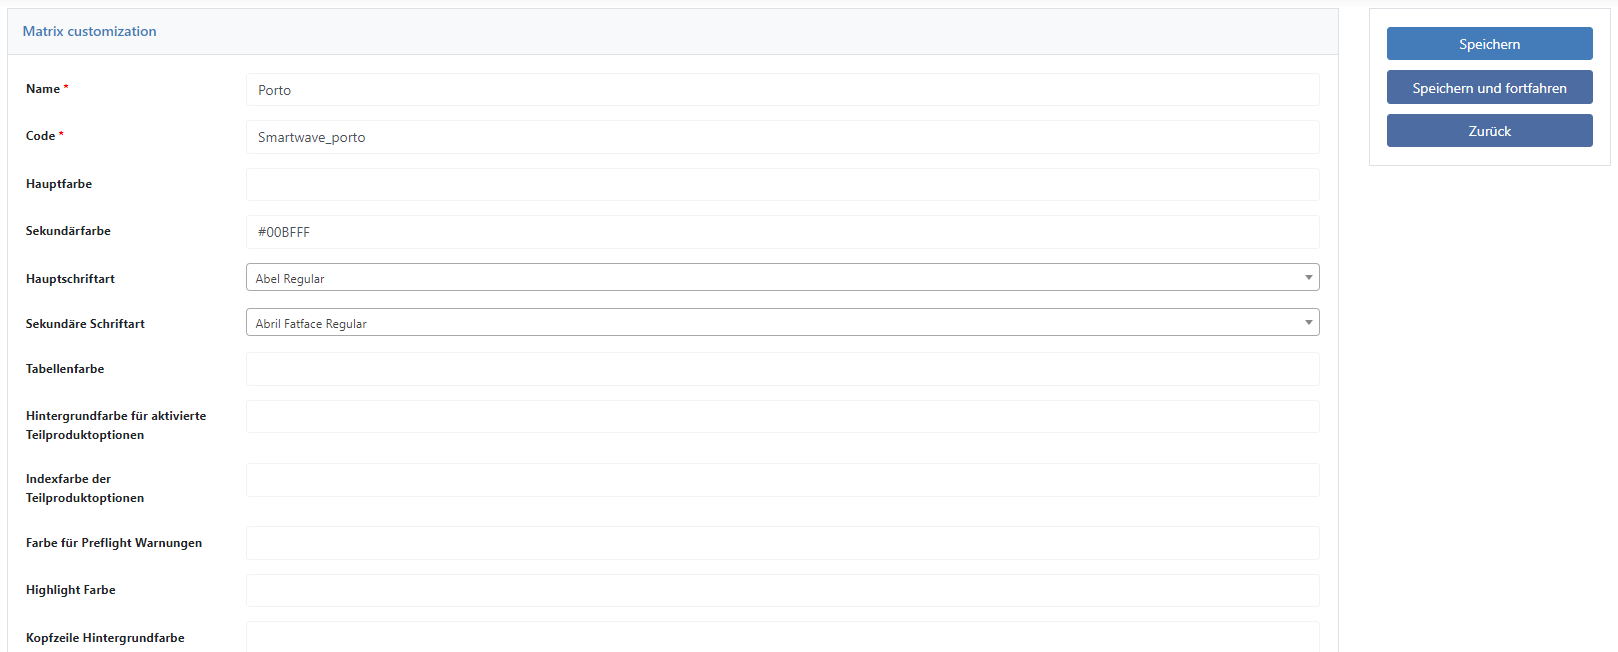
Subtheme product pages: Navigate to the menu "Web Product → Matrix Customization" in the data center and click on "Create" to create a subtheme for the product pages. Here you will find settings for colors, button heights, fonts and more.

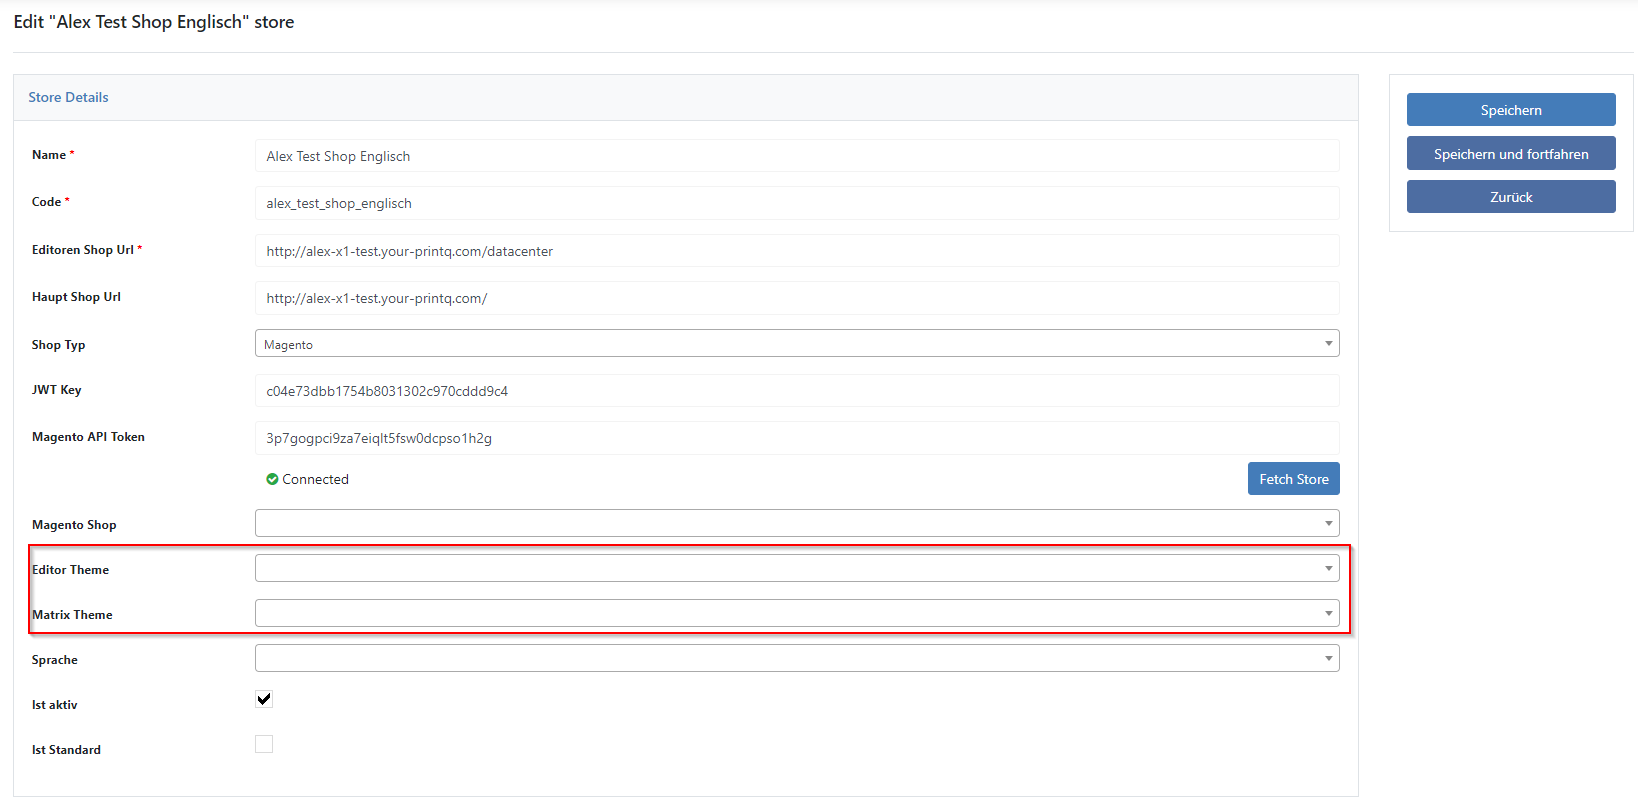
Link subthemes: As in Magento, the subthemes must be linked to the corresponding store. To do this, navigate to the menu "Shops → Shops" and click on "Edit" at the store of your choice.
Here you can now assign your subtheme to the store. Afterwards, the store files have to be activated once again.
