X2 Approval workflow (X2 EN)
INTRODUCTION
The settings for the approval workflow can be found in the menu under CloudLab > Approval. Here you can create groups of admins who are authorized to approve orders, as well as rules to be applied for approval requests.
CREATE ADMIN GROUPS
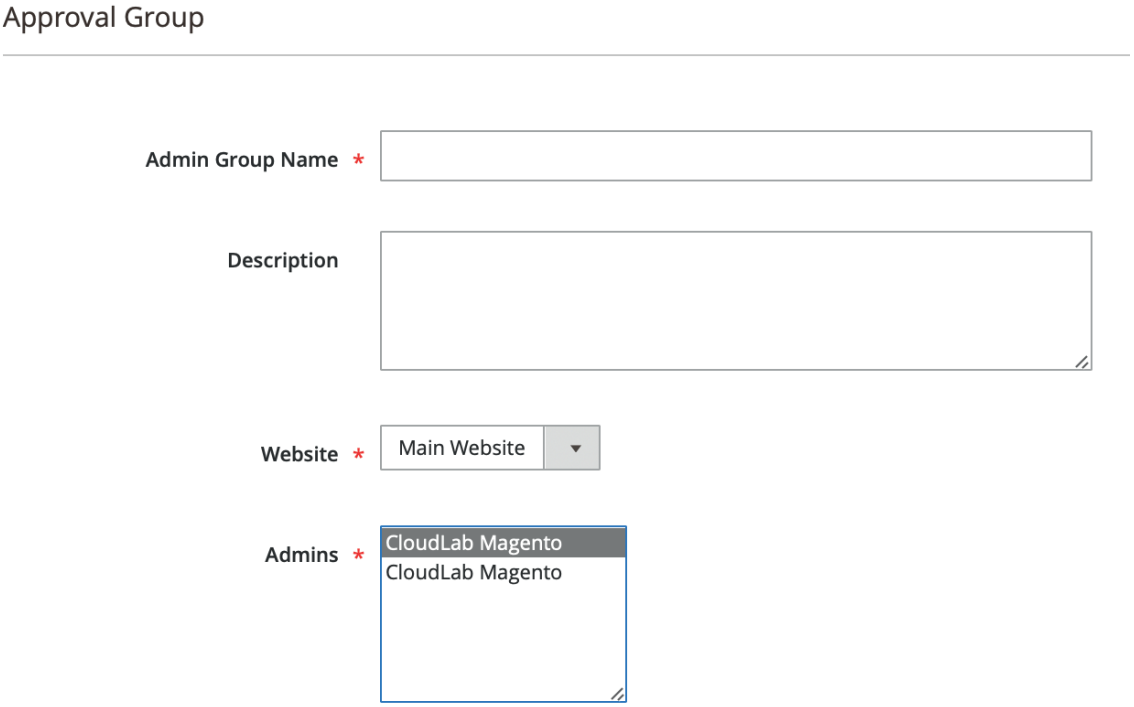
First of all you need to create admin groups under CloudLab > Approval > Approval Groups. To do so, click Add Admin Group on the upper right.

ADD NEW ADMIN GROUP
Admin group name
This is where you name the admin group. Later on you can identify this group by its name in the list of all groups.
Description
This is where you name the admin group. Later on you can identify this group by its name in the list of all groups.
Website
Select the website for which you want the admin group to be applied.
Admins
Here you select the frontend administrators who are going to be members of the admin group and hence authorized to approve orders. Hold CTRL (CMD on Mac) to select more than one administrator.
Admin groups are listed under CloudLab > Approval > Approval Groups and can always be modified later. This way you can easily add new admins to existing groups.
ESTABLISHING APPROVAL RULES
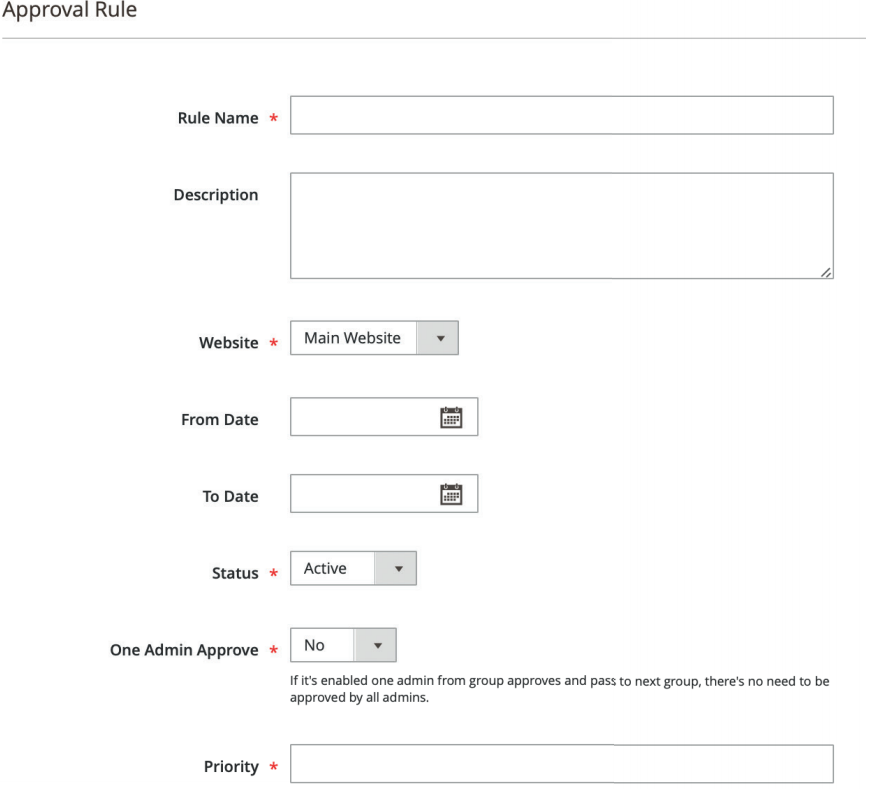
Once you have created your approval group(s) you can define rules which will determine, which admin group has to approve a certain order. Just click CloudLab > Approval > Approval Rules and then Add Rule on the upper right.

GENERAL INFORMATION
Rule name
Here you name the rule. This way you can easily identify it in the complete rule list.
Description
Here you can optionally enter information about the function of the rule by means of an additional description.
Website
Select for which website you wish the rule to be applied here.
From Date/To Date
This is where you set from when to when you want the rule to be applied. Status This rule is only considered in the approval workflow if this box is “enabled”.
Priority
Finally, specify the priority (from 1 to 9999) for the rule to be applied. The smaller the value, the earlier the rule will be considered.
After this, conditions are defined via the menu on the left.
DEFINE CONDITIONS
Here you can specify, when exactly a certain rule is to be applied: for example if a customer has entered a specific postal code in the shipping address or the order value exceeds a certain amount. The rule will only be applied, if all conditions listed under and connected to the respective order are met.

Click on the green “plus”-symbol to define a new condition. Then first select the basis of the condition via the now displayed menu, for example Payment Method or Subtotal.
In a second step, the attribute of the condition is set, as for example ”is“ or ”is not“ or reference values like ”larger than“ or ”less than“. In the last step select the value of the condition – for Payment Method this could for example be “Maestro” or “PayPal Credit” or a specific value for the subtotal.
ACTIONS
Finally, admin groups, which will receive requests to approve an order falling under this rule are selected via Actions in the menu on the left.
Select an admin group in the menu and click Add New Admin Group. Using Priority in the view on the right you can also determine the order in which the individual admin groups will be requested to give their approval.
