X1 Distribute
Supplier E-Mail

Here you enter the destination email address for the supplier email.
Run in test mode

IP address to run
Enter the IP address to be used for the test here.
Run in test mode
Activate or deactivate the test mode.
Or number
Here you enter the order number to be used for the test.
Production Holidays

Production Holidays
You can add production-free times via the "Add Value" button.
Resize preview image

Resize preview image to
Here you specify to which size the preview images should be scaled.
Product Page Configuration

Enable product project title
Enable or disable the product project title.
Hide the 'Add to Cart' button on the product page
Select whether to hide the "Add to Cart" button on the product page.
Show Summary on Product Page (Matrix Products Only)
Here you can select whether to show a summary on the product page of matrix products.
Store Selection

Delivery Days
Here you can specify a global production time (in days), which will be added to production time of web products and partial product option values.
Prinect connection

Enable connection to Prinect
Activate or deactivate the connection to Prinect.
Prinect server address
If required, enter the server address for connecting Prinect modules here.
Cost Center Number

Enable Cost Center Number
Here you can show or hide an input field for the cost center on the product page.
Production Time

Enable Production Time
Here you can enable or disable the function.
Distribute Email Configuration

Attach Printfiles to Distribute Email
Here you can choose whether to attach the print files to the Distributs email.
Invoice/Shipping

Enable automatic invoicing
Select whether to send invoices automatically.
Invoicing payment methods
Here you can set the payment method for invoices in the selected store (credit card, bank transfer, etc.).
Multi shipping min qty
Here you enter the minimum quantity for shipping to different addresses.
Enable automatic shipping
Select whether to enable automatic shipping.
Logo
Here you can upload your logo.
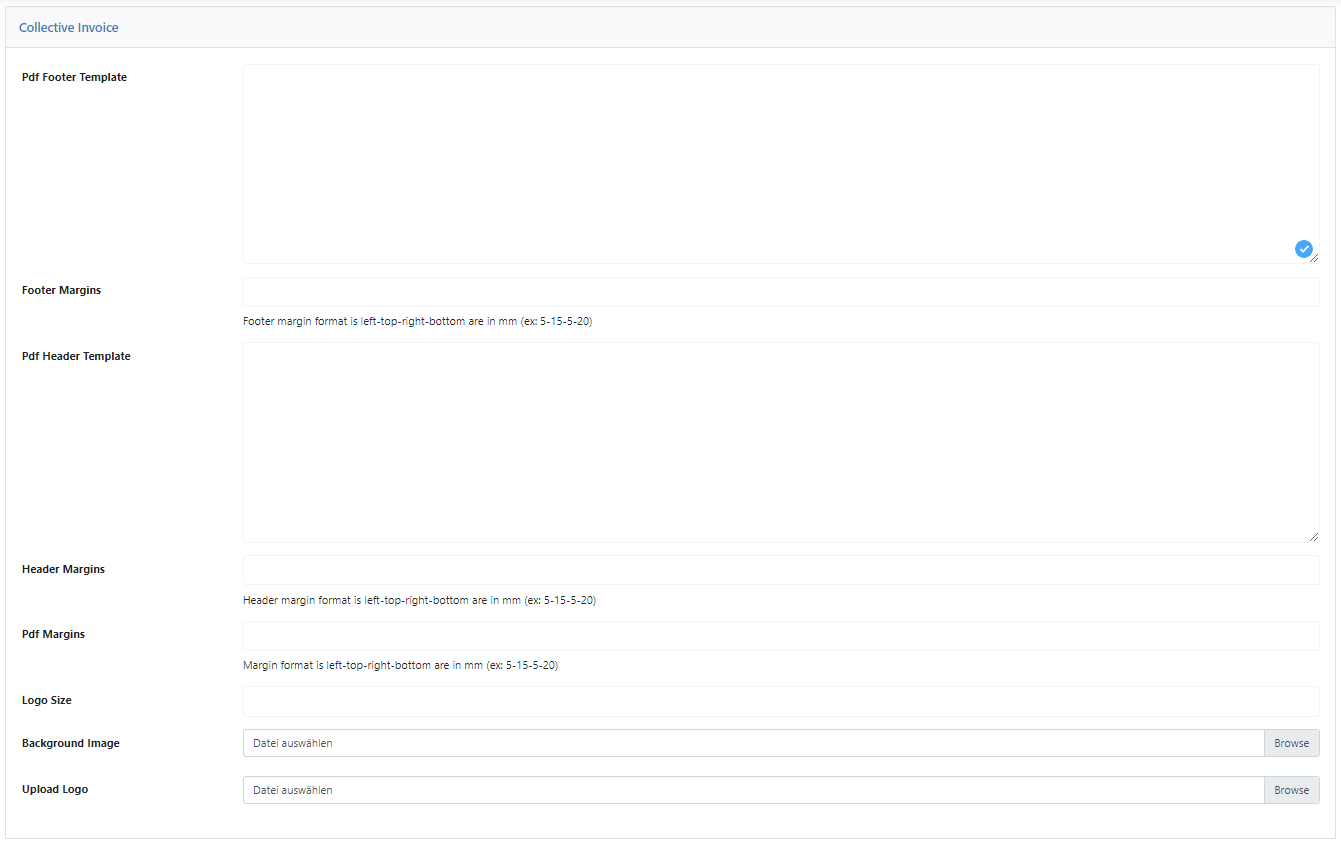
Collective Invoice

Pdf Footer Template
Edit the footer area of the PDF invoice formatted in HTML text here.
The invoice function can also be assigned to individual customers. To do this, select a customer under the Customers tab and click Account Information on the left. Then set the menu next to Enable Collective Invoice to "Yes" and click Save Customers in the upper right corner.
Footer Margins
This is where you enter the spacing of the PDF footer.
The format of the footer is left-top-right-bottom in mm (e.g.: 5-15-5-20).
Pdf Header Template
Here you can insert a template for the PDF header.
Header Margins
Here you can enter the spacing of the PDF header.
The format of the header is left-top-right-bottom in mm (e.g.: 5-15-5-20).
Pdf Margins
Here you can set the distance to the margin of the invoice sheet in millimeters (mm).
The format is left-top-right-bottom in mm (e.g.: 5-15-5-20)
Logo Size
Sets the size of the logo printed on the invoice that can be uploaded.
Background Image
Upload an image for the background of the PDF invoice here.
Upload Logo
Optionally upload a logo to be placed on the invoice here.
Distribute Run Type

Enable Production Time
Here you can set the store to closed store or open store mode.
Open Shop disables automatic invoice creation and dispatch through the printQ distribution process. Instead, printQ only forwards the order to production and sends you a job ticket once the invoice has been created, either manually (e.g. after receipt of the advance payment) or automatically through a payment link (e.g. PayPal, Payone, etc.). In this way, printQ ensures that no order goes into production before it has been marked as paid.
Closed Shop assumes that it is a B2B store where payment is usually handled via payment on account within framework agreements. Therefore, the printQ sales process will automatically generate invoices once orders have been routed to production and you have received a job ticket. This is a fully automated process that requires no manual intervention.
Run orders newer than
Here you can specify whether all orders or only orders older than X weeks, months or one year should be handled.
Impositioning

Enable Impositioning
Here you can enable or disable the function.
By default, impositioning is limited to simple business cards on SRA3 sheets. If you need adjustments here, our support team will be happy to help you.
Production Methods Transfer

Error Email Address
Enter an email address for error messages in case the data transfer via FTP/SFTP should fail.
Connect files automatically

Automatically connect files
Here you have the possibility to automatically connect uploaded files to the purchased order without the customer having to assign them via a button in the frontend.
Transactional Mail

Enter the email address here.
Name
Here you enter the name that should be displayed.
