The relevant functions of Magento 2 at a glance
CATALOGUE
The catalog manages all shop products. Magento does not distinguish between stock products and personalized print products.
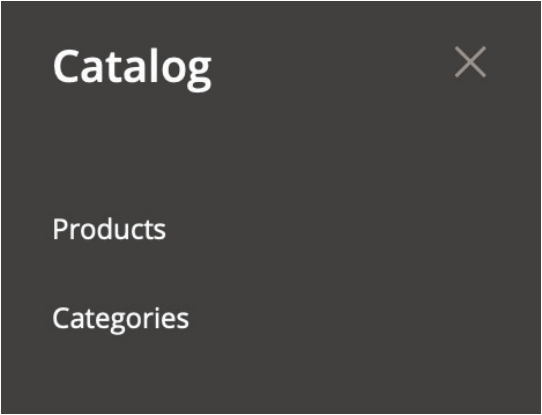
The menu items in particular:
Products
Categories
In Products, print products are created and configured, then added to the Magento product catalog and made visible in the storefront.
CUSTOMERS
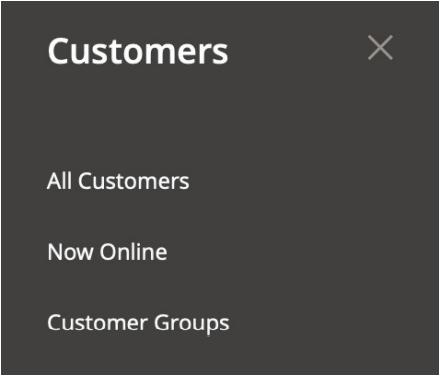
In this menu you manage all your customer data. You can view order histories for all your customers and manually change or update customer information.
For example, you can allow individual customers to pay on account. You can group customers to grant discounts to your employees, or sort business customers according to whether they are subject to VAT or not.
MARKETING
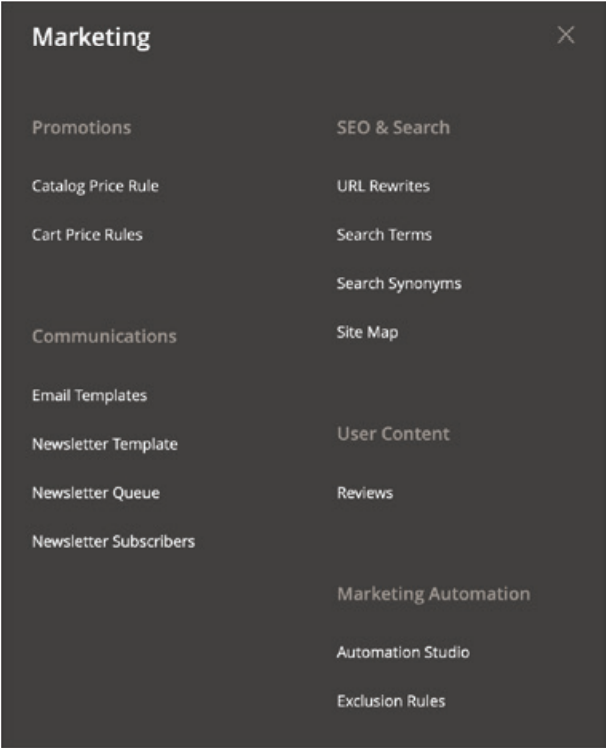
Here you configure vouchers and discounts, for example for individual customer groups. You determine who receives which discount in which period of time, either on individual products or on the entire shopping cart. You can also generate individual voucher codes and send them to newsletter subscribers for example, and configure shopping cart price rules and catalog price rules. The subscribers and newsletter settings can also be accessed via this menu.
CONTENT
This is the content management system of Magento. Here is where the administrator can maintain or edit website content beyond mere product texts. This can for example include a company description, terms and conditions or polls. In the CMS design and content are edited separately, so you can easily and comfortably keep your texts up to date.
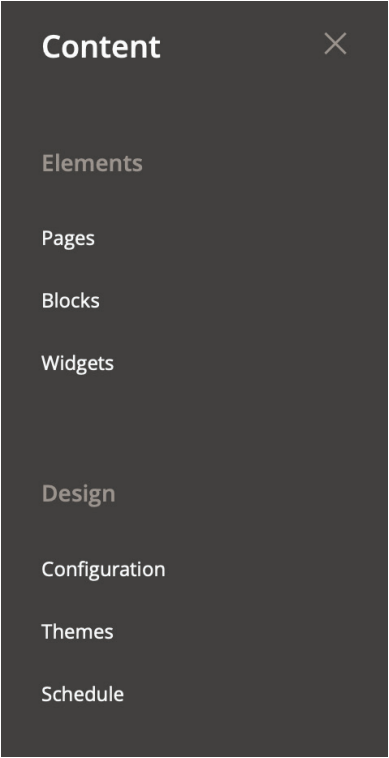
Static blocks or widgets, once created, can be used on an arbitrary number of sub-pages or product pages in the shop. While static blocks will always display the same generated content, widgets are filled dynamically, meaning they can for example display an arbitrary number of new products or products recently viewed by the customer. Contents will update automatically.
The most important pages in the porto-theme are “Home“ (home page) and “no route“ (404-page). If no home page has been defined, the link will lead nowhere, and the customer will see the “no route“-page, as with any other dead link. You can make smart use of the 404-page to draw your customers to your shop, for example by presenting interesting products via widget. You can add more pages in your desired layout just as you require them.
Configuration of pages
To configure a new page, go to Content - Pages - Add new page in the backend. There are five sub-menus available for configuration:
Content
SEO
Page in web pages
Design
Own design update
At the top you define the page title. In multi-store systems, under Page in Web Pages, you must also define the memory for which the page is to be used.
In Content, you store texts and images of the page. If the appearance of the page differs from the general appearance, use XML and CSS in Design to adjust the structure and appearance. The fields in the Search Engine Optimization section contain all information relevant for search engines.
Mageplaza
All important links to Mageplaza extensions of the system are gathered here. This takes you to the configuration of the search function, to the nested navigation, and to all relevant documentation.
Porto
Porto is the default theme of the system. This menu item takes you to all the settings with which the design can be adapted to your wishes. There are also links to the configuration menus of three central elements of Porto available:
Mega Menu
Social Feeds
Dailydeals
Stores
This menu item is used to make basic settings for your web shops. They are divided into the following categories:
Settings
Taxes
Currency
Attributes
Shipping
All these categories of the store settings have individual sub-items that take you directly to special options, such as ordering conditions, tax rules, exchange rates for international operations, or the organization of shipping companies for different products.
Configuration of static blocks
Static blocks are uniquely referenced by means of Identifi ers and created by you. These are the most important internal identifiers:
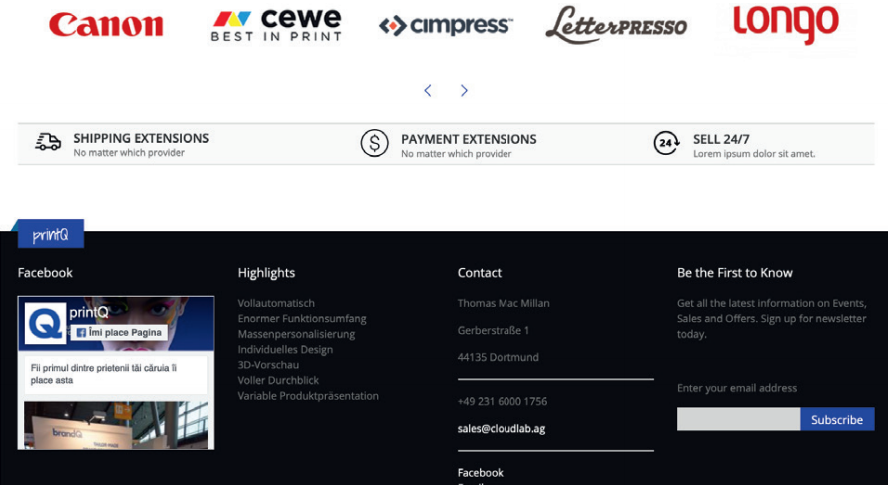
porto_facebook
porto_footer_information
porto_footer_content
These three identifi ers represent the three blocks on the left in the screenshot below. You can confi gure a new static block in the backend under Porto - Settings Panel - Add Footer. The block title and the identifi er („Static Block ID“) can be entered here. The Block title is an informative description in the backend, while the identifi er is used as an internal reference to call the static block. Enter the desired content in the editor at the bottom of the page.
REPORTS
This is where you‘ll always keep an overview of everything happening in your shop:
Marketing
Sales
Customers
Business Intelligence
Reviews
Products
Statistics
Customer Engagement
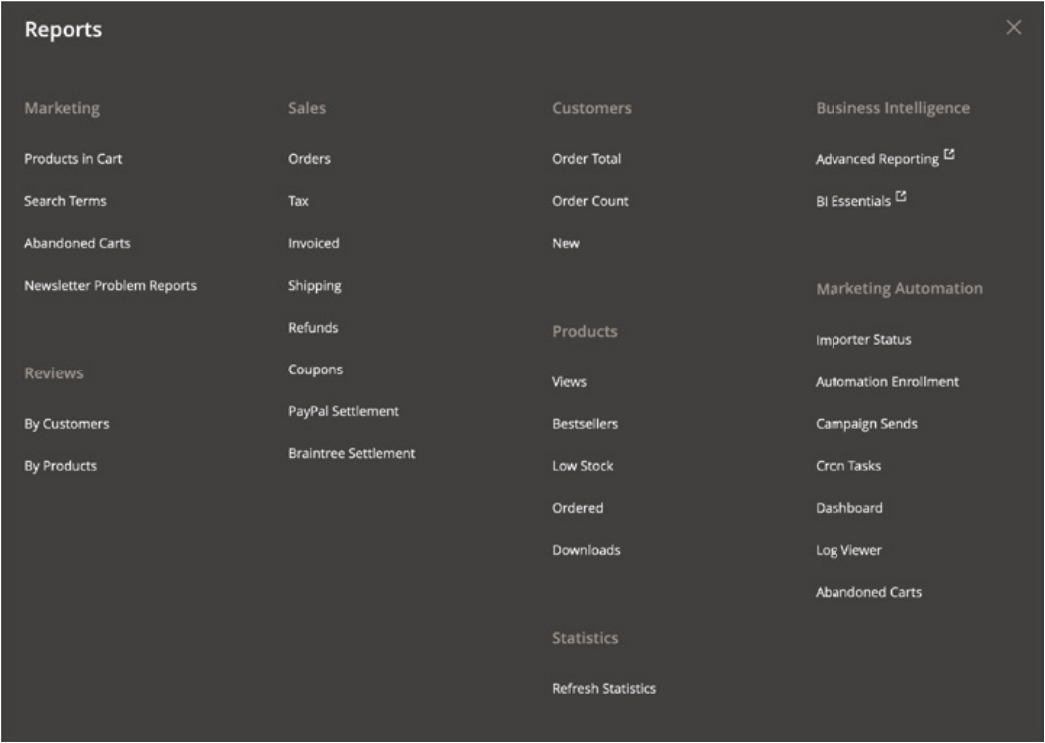
You can export some of these reports and process them externally. There is also a number of extensions available that add functions to this area and that extend the design of reports and evaluations.
Our support team will gladly let you know, which extensions are already successfully in use in combination with printQ.
SYSTEM
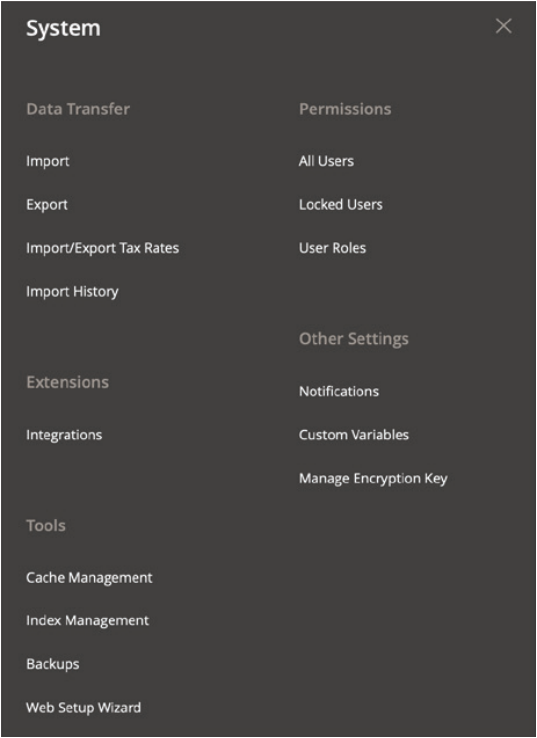
Along with the catalog, this is another menu item with important additional confi guration options. While the former one is used to edit shop products, all settings and adjustments concerning the shop are made in the system. These are the most commonly used:
Import data
Adjust tax rates
Assign user rights
Install extension
Under Tools you will find the settings for the data backup. If you operate several shops in different countries, the menu item Tax Rates is relevant for you. Authorizations regulates the administration of users and their rights. This allows you to control exactly which user can view and edit which menu items in the backend. Via Extension you install extensions to add further functions to the shop.
Cache management plays a vital role in Magento. The shop system is able to store several contents temporarily in order to be able to present them faster to the customer. The cache must be updated if necessary, as well as the index in Index Management (see box). Stores can be conveniently managed by using the equivalent sub-item.
CLOUDLAB
Though you can also confi gure printQ products elsewhere in the system, this is where print products are mainly created and confi gured, as well as product parts and options, own fi xed price lists and selection rules and deny rules in the rules for product parts. Here you store your personalization templates and 3D-models, placeholder images for matrix products and production methods.
In the next step, the new products are added to the Magento catalog and made visible for the customer. We will demonstrate this, using specifi ed examples, in the following chapters.
PORTO
CloudLab delivers Magento with the Porto theme. The confi guration of the Porto theme is done under the settings item of the same name. The sub-menu consists of the following menu items:
Settings Panel
Design Panel
Activation
Mega Menu (Configuration)
Social Feeds (Configuration)
Dailydeals (Configuration)
We will now take a closer look at the first two functions, to enable youto edit your shop fit to your company and your corporate designright from the start.
General settings for the structure of the shop can be made in the Settings Panel, basic settings for the design in the Design Panel. We start with the essential options in the Settings Panel.
CACHE MANAGEMENT
Caching of your shop is activated by default, to ensure that frontend and backend are displayed smoothly. For this purpose, Magento caches individual pages, like product pages, content pages and text blocks. If you make any changes to one of these cached pages or add new elements or products, Magento will send you a notifi cation in backend, prompting you to update the cache. This function is very useful during operation. Should your shop still be in the design stage and not yet publicly accessible, though, you can safely deactivate cache management.
THE SETTINGS PANEL
Display
The base theme setting configuration can be done in Porto -> Porto - Settings Panel.
General
Here you decide the width of the shop in the browser window, as well as whether the shop should have a box frame, whether sharing buttons should be displayed and more. You can also select the width of the website in pixels in Maximum Page Width.
Header/Footer
If you want to use a „sticky header“ that is also visible when scrolling, you can activate this under Header. There are 20 different types available for the design of the header. Other header settings include displaying flag icons when the store has several language options or activating/deactivating a login popup for customer accounts.
Category View/Product View
In the Settings Panel, these two sections define how categories and products are displayed in the selection overviews in the shop. The width and the height of the thumbnails are set here, along with the settings of additional information (ratings, price, links to the wish list or to other products).
Product Label
Here you can activate that products which are newly added to the shop are automatically provided with a „NEW“ lettering.
Contact Us
In order to inform your customers about how and where they can contact you, you may enter your company address in this section for a Google Maps view as well as general contact data, e.g. for display in the footer of the page.
THE DESIGN PANEL
Let‘s continue with the settings in the Design Panel section. This section does not handle the organization of individual shop functions, but the visual aspect of your website. The base theme design configuration can be done in Porto -> Porto - Design Panel.
General
Under Theme Colors you can set the basic color of your customized version of the porto design. It is then activated by default for certain text fields, background areas and other elements.
Font
Besides the basic color, you can also determine the font used on your page and its size (Basic Font Size). These settings are made under Font Family - Google Fonts. Some google fonts are not supported by all browsers, so make sure that you also specify a basic font under Basic Font Family additionally. These browsers will then use the basic font which is set here.
Colors
In addition to the basic theme color, you can set other colors for specific page elements here. These modifiable elements include:
Text
Links (including Hover Color)
Buttons (text, background and Hover color)
Breadcrumbs (text, link and hover color)
Product Labels (text and background color)
Header/Footer/Main Content
If the general options for the header and footer in the Settings Panel are not sufficient for your needs, you can further modify these components as well as the main area of the shop here. In order to do so, set the box in the respective area to „Yes“. The other options will then appear.
You can change the header and footer in the same way as the elements under Colors. First of all, you can assign a background color and/or a background image to the Main Content. In the text field Custom Style you can also enter your own CSS code for more in-depth changes, if required.
