printQ - creating products (vers. 6)
CREATING PRODUCTS IN PRINTQ
Now that you have familiarized yourself with the settings in the CloudLab menu, this part of the handbook will guide you through the actual creation of products. We will limit our explanations on Magento to the most important parameters, which are relevant for printQ. Should you have any further questions regarding the functionalities of Magento, we recommend you take a look at the Magento-documentation or one of the numerous Magento-handbooks.
printQ distinguishes between three product types:
store product
print product/matrix product
personalization product.
These three types of products build upon each other, the store product being the easiest product type. In the print product, this type is enhanced by print parameters like, for example, paper, format and color, and it enables the customer to upload print data in frontend. The personalization product, however, increases the customer‘s possibilities to personalize and design his print product online. For the customer this means that he does not have to upload ready-to-print data to the shop, but he can comfortably personalize and finalize his print product online.
Products have to be assigned to categories before they can be displayed in Magento-frontend. These categories will, depending on your settings, appear right in the navigation or can be linked elsewhere.
CREATE AND MANAGE CATEGORIES
The configuration of categories takes place in the backend under Catalog > Categories. Magento distinguishes between main categories and sub-categories. A main category is the „main placeholder“ for a store, so each store has its own main category. This category is assigned to the respective store in the store management. A main category can contain as many subcategories as you like, and a sub category can also contain other sub categories. Categories can thus be nested deeply, at least in theory.
Experience has shown that for the sake of clarity you should not exceed a depth of three levels below the main category.
To create a category, you must enter general information about the Content and specify the Display Settings. You can assign a Design to the category, as well as Products in the category.
GENERAL INFORMATION
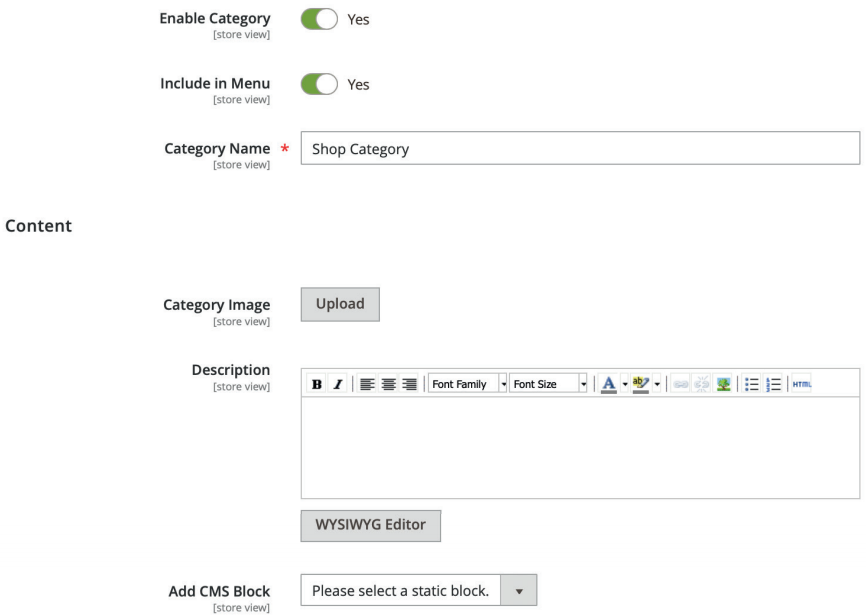
Name
Name of the category and display name in frontend and navigation.
Activate category
Use this box to activate or deactivate the category. If you set „No“, this category is deactivated and invisible in the frontend.
Description
Here you have the possibility to describe the respective category in more detail. The text is displayed above the product category in frontend. Search engine relevant terms (keywords) can be placed here
Category Image
Depending on the theme, this image is located above the category in the frontend.
Show in menu
This configuration allows the activation or the deactivation of the display in the menu. Unlike the deactivation in Activate Category, the category remains accessible via other links in the frontend.
DISPLAY SETTINGS
Display Mode
You can assign static blocks, products or both to categories, depending on the design of your shop..
Anchor
The anchor adds a filter function to the superordinate category.
Available Product Listing Sort By
You can define the sorting options for products within the category here (for example in alphabetical order by product name, lowest price first, highest price first, etc.).
Default Product Listing Sort By
Standard value for the sorting order of products within the respective category.
Layered Navigation Price Step
Entering a numeric value (e.g. 500) here allows you to activate a multilevel filter function for this category.
Design
You can give every category a specific design, whether permanently or for a special occasion or period (for example for promotion campaigns or seasonal occasions).
Category Products
This is where you assign the respective products to a category. Make sure the filter is set to “Any” or “No”, because otherwise only products, which have already been assigned to this category, will be displayed. Confirm each new filter setting with Reset filter. You can comfortably move and sort your set categories or arrange them hierarchically via drag&drop.
STORE PRODUCTS AS BASE FOR PRINTQ-PRODUCTS
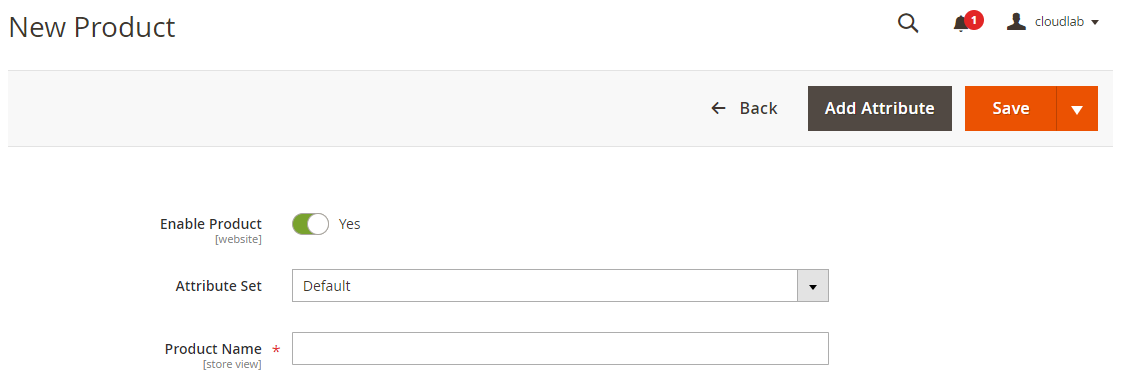
Building on the stock product, we will now take a look at the creation of printQ products. In the section Catalog > Products you can create your products. Make sure you choose “Default” for the attribute set in the first step, right after clicking on “Add Product”.
After this, you should complete the product information using the current and the following menu section. These are the main settings:
General
GENERAL
Article number
This is a unique alphanumeric number for the product within the shop system, which internally is also called SKU.
Weight
Enter the product weight in kilograms, with a decimal point as decimal separator. You have to enter the weight per unit, generally per piece.
Set Product as NEW from
Here you can define a specific time, during which the banderole „New“ will be laid over the product image. Stock Status Here you determine whether the product is in stock or not. Its display in the frontend can be (de-)activated via the box Enable Product.
URL Key
The URL key is either set automatically or manually. It defines the URL after the base URL.
Visibility
This setting defines, if and via which channel the product can be found in the shop: Catalog, search or both. Next, please enter the Country of Manufacture.
PRICE
Price
Enter the product price per unit here.
Tax Class
Define the tax class for your product. In most cases, products will be taxed at the full tax percentage.
SEARCH ENGINE OPTIMIZATION
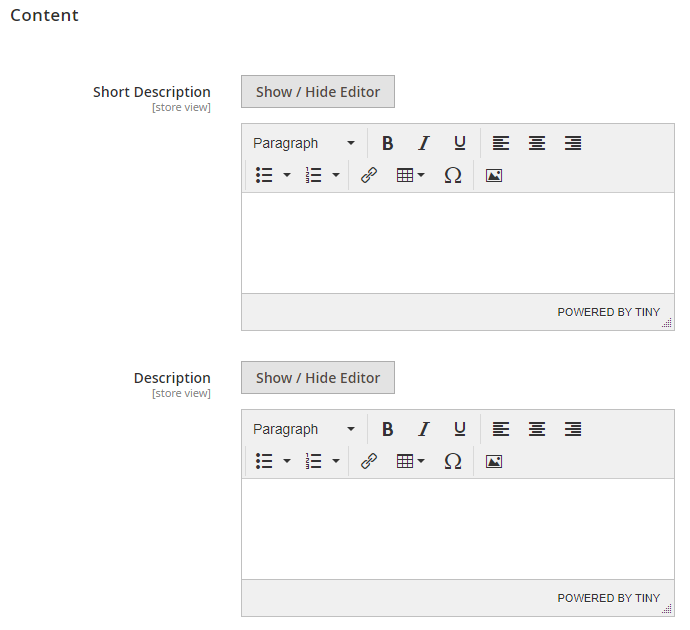
Fill in these fields with all search engine relevant information. Compose descriptive product texts containing the most important keywords.
IMAGES AND VIDEOS
Product images and videos can be uploaded here. You can upload an arbitrary number of images and videos, which will then be displayed in the respective product area in the shop view

INVENTORY
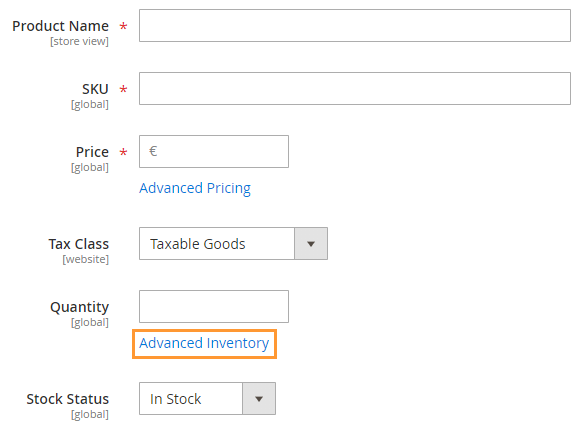
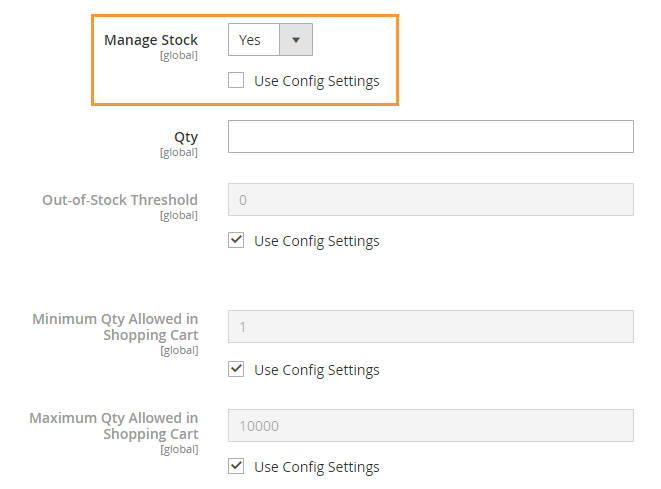
You can configure your warehouse management and stock via the pop-up menu that you find in Quantity. A product will only be displayed in frontend, if either „Manage Stock“ is deactivated (setting: „no“) or the following conditions are met:
Quantity (Qty) > 0
Stock Availability = In Stock
PRODUCT IN WEBSITES
Here you have to define, in which store on which website you want the product to appear. If you run more than one shop, one product can be displayed in one or several shops. If you do not make any choice here, the product will not be published.
CATEGORIES
The product must be assigned to a category to be displayed in the desired place in your shop. Please note, that assigning a product to a category does not automatically add it to the superordinate category as well. You should always choose each category you want the product to appear in separately.
RELATED PRODUCTS, UP-SELLS, CROSS-SELLS
Magento provides you with valuable functions for additional sales. These are offered to customers on the following pages:
Related Products: Product Page
Up-Selling: Product Page
Cross-Selling: shopping cart
As Related Products, you offer your customers useful supplements to the current product. In the up-sells section you can suggest alternative articles of a higher quality or price, while cross-sells means displaying products, which are similar to those currently in the shopping cart, or which have been purchased by other customers together with the current products earlier.
Assignment in backend is done by checkbox, similar to the categories. It is essential that the filter is set to “Any” (confirm changes by clicking on “Reset Filter”), because otherwise no selectable products will be displayed.
