printQ - creating products
Now that you have familiarized yourself with the settings in the CloudLab menu, this part of the handbook will guide you through the actual creation of products. We will limit our explanations on Magento to the most important parameters, which are relevant for printQ. Should you have any further questions regarding the functionalities of Magento, we recommend you take a look at the Magento-documentation or one of the numerous Magento-handbooks.
printQ distinguishes between three product types:
store product
print product/matrix product
personalization product.
These three types of products build upon each other, the store product being the easiest product type. In the print product, this type is enhanced by print parameters like, for example, paper, format and color, and it enables the customer to upload print data in frontend. The personalization product, however, increases the customer‘s possibilities to personalize and design his print product online. For the customer this means that he does not have to upload ready-to-print data to the shop, but he can comfortably personalize and finalize his print product online.
Products have to be assigned to categories before they can be displayed in Magento-frontend. These categories will, depending on your settings, appear right in the navigation or can be linked elsewhere.
CREATE AND MANAGE CATEGORIES
The configuration of categories takes place in the backend under Catalog - Categories. Magento distinguishes between main categories and sub-categories. A main category is the „main placeholder“ for a store, so each store has its own main category. This category is assigned to the respective store in the store management. A main category can contain as many subcategories as you like, and a sub category can also contain other sub categories. Categories can thus be nested deeply, at least in theory. Experience has shown that for the sake of clarity you should not exceed a depth of three levels below the main category.
To create a category, you must enter general information about the Content and specify the Display Settings. You can assign a Design to the category, as well as Products in the category.
General information
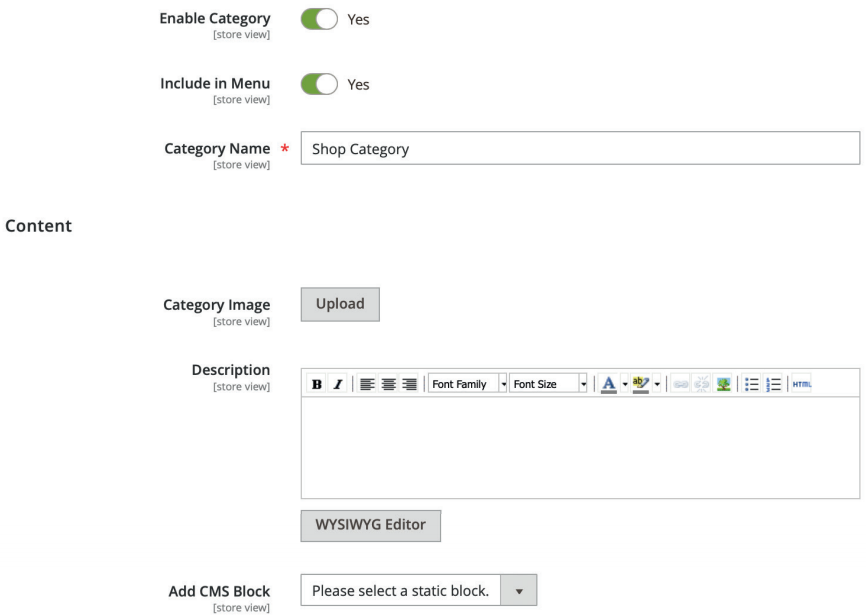
Name
Name of the category and display name in frontend and navigation.
Activate category
Use this box to activate or deactivate the category. If you set „No“, this category is deactivated and invisible in the frontend.
Description
Here you have the possibility to describe the respective category in more detail. The text is displayed above the product category in frontend. Search engine relevant terms (keywords) can be placed here
Category Image
Depending on the theme, this image is located above the category in the frontend.
Show in menu
This configuration allows the activation or the deactivation of the display in the menu. Unlike the deactivation in Activate Category, the category remains accessible via other links in the frontend.
Display Settings
Display Mode
You can assign static blocks, products or both to categories, depending on the design of your shop..
Anchor
The anchor adds a filter function to the superordinate category.
Available Product Listing Sort By
You can define the sorting options for products within the category here (for example in alphabetical order by product name, lowest price first, highest price first, etc.).
Default Product Listing Sort By
Standard value for the sorting order of products within the respective category.
Layered Navigation Price Step
Entering a numeric value (e.g. 500) here allows you to activate a multilevel filter function for this category.
Design
You can give every category a specific design, whether permanently or for a special occasion or period (for example for promotion campaigns or seasonal occasions).
Category Products
This is where you assign the respective products to a category. Make sure the filter is set to “Any” or “No”, because otherwise only products, which have already been assigned to this category, will be displayed. Confirm each new filter setting with Reset filter. You can comfortably move and sort your set categories or arrange them hierarchically via drag&drop.
STORE PRODUCTS AS BASE FOR PRINTQ-PRODUCTS
Building on the stock product, we will now take a look at the creation of printQ products. In the section Catalog – Products you can create your products. Make sure you choose “Default” for the attribute set in the first step, right after clicking on “Add Product”.
After this, you should complete the product information using the current and the following menu section. These are the main settings:

General
Article number
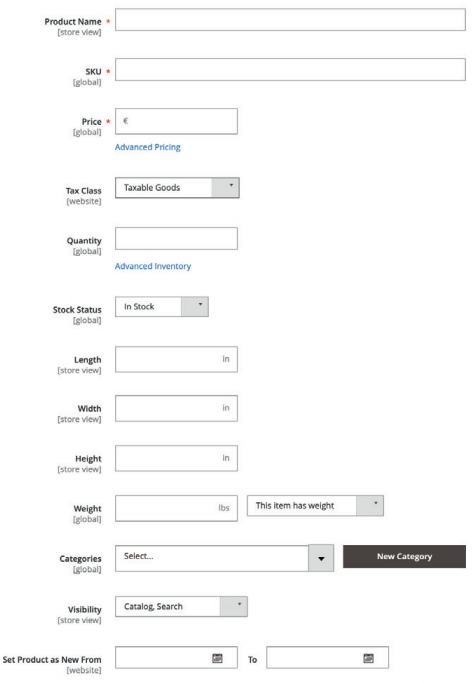
This is a unique alphanumeric number for the product within the shop system, which internally is also called SKU.
Weight
Enter the product weight in kilograms, with a decimal point as decimal separator. You have to enter the weight per unit, generally per piece.
Set Product as NEW from
Here you can define a specific time, during which the banderole „New“ will be laid over the product image. Stock Status Here you determine whether the product is in stock or not. Its display in the frontend can be (de-)activated via the box Enable Product.
URL Key
The URL key is either set automatically or manually. It defines the URL after the base URL.
Visibility
This setting defines, if and via which channel the product can be found in the shop: Catalog, search or both. Next, please enter the Country of Manufacture.
Price
Price
Enter the product price per unit here.
Tax Class
Define the tax class for your product. In most cases, products will be taxed at the full tax percentage.
Search Engine Optimization
Fill in these fields with all search engine relevant information. Compose descriptive product texts containing the most important keywords.
Images and Videos
Product images and videos can be uploaded here. You can upload an arbitrary number of images and videos, which will then be displayed in the respective product area in the shop view

Inventory
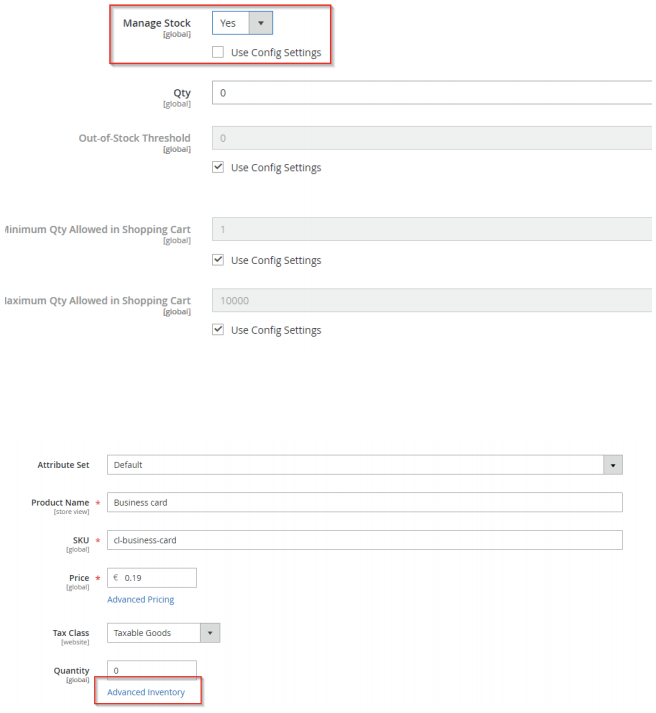
You can configure your warehouse management and stock via the pop-up menu that you find in Quantity. A product will only be displayed in frontend, if either „Manage Stock“ is deactivated (setting: „no“) or the following conditions are met:
Quantity (Qty) > 0
Stock Availability = In Stock
Product in websites
Here you have to define, in which store on which website you want the product to appear. If you run more than one shop, one product can be displayed in one or several shops. If you do not make any choice here, the product will not be published.
Categories
The product must be assigned to a category to be displayed in the desired place in your shop. Please note, that assigning a product to a category does not automatically add it to the superordinate category as well. You should always choose each category you want the product to appear in separately.
Related Products, Up-Sells, Cross-Sells
Magento provides you with valuable functions for additional sales. These are offered to customers on the following pages:
Related Products: Product Page
Up-Selling: Product Page
Cross-Selling: shopping cart
As Related Products, you offer your customers useful supplements to the current product. In the up-sells section you can suggest alternative articles of a higher quality or price, while cross-sells means displaying products, which are similar to those currently in the shopping cart, or which have been purchased by other customers together with the current products earlier.
Assignment in backend is done by checkbox, similar to the categories. It is essential that the filter is set to “Any” (confirm changes by clicking on “Reset Filter”), because otherwise no selectable products will be displayed.
PRINTQ – THE MATRIX-PRODUCT
A printQ-print product consists of several elements and is created in different sections of the Magento-backend, before it finally gets published in the catalog, which you should be familiar with from the creation of a stock product. The print product consists of product part options, the product part and the final Magento-product. To create a print product, first of all you should configure the product part options.
PRODUCT PART OPTIONS
Product part options form the basis for your print products. With these you choose paper, formats, coloring, bindings, finishes, etc.
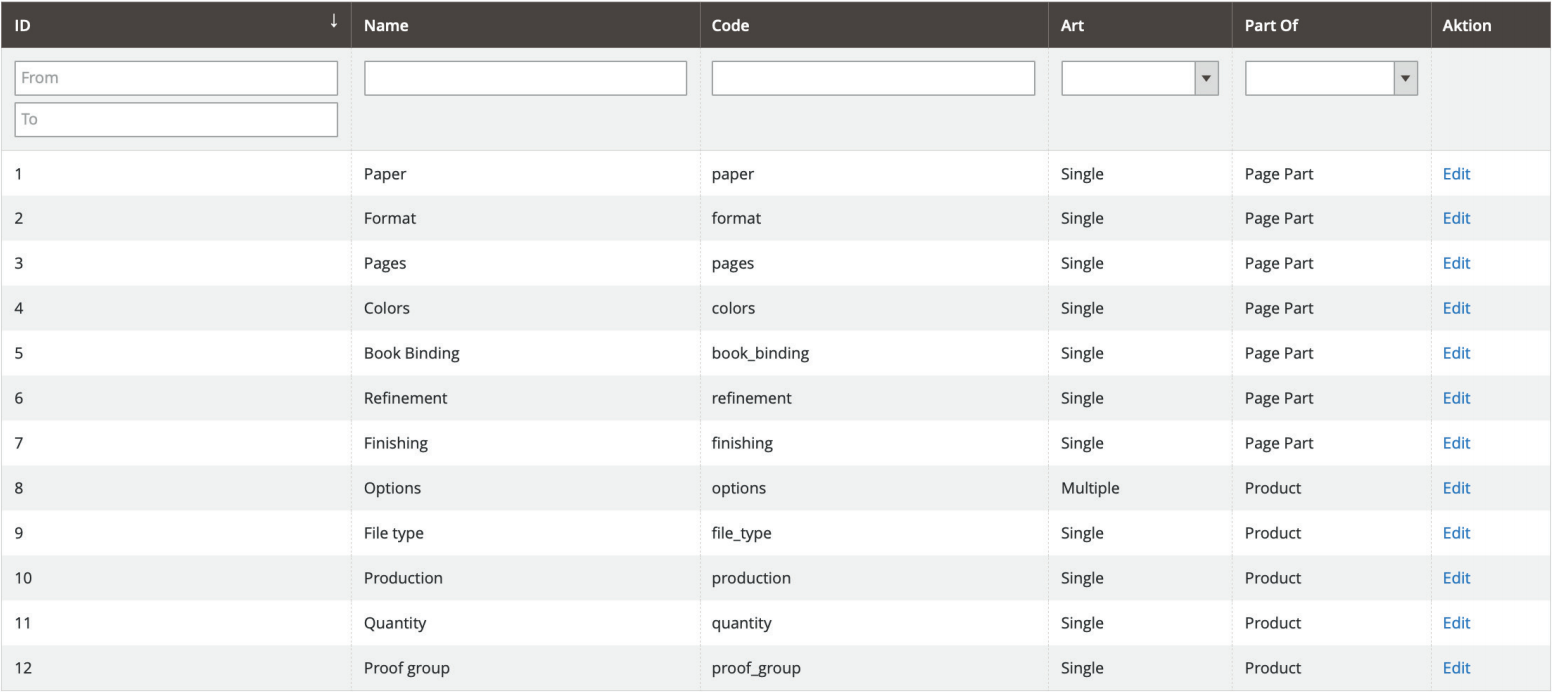
Here printQ distinguishes between product part (Page Part) and product categorization (Product). We deliver printQ with the following default standard page and product part options:
Page Part
Paper
Format
Pages
Colors
Book Binding
Refinement
Finishing
Product
Options
File type
Production
Quantity
Proof group
The distinction between Page part and Product is explained by the diversity of the possible print products. Leaflets, for example, only consist of one product part with its respective product part options. A brochure, on the other hand, can consist of the product parts “content pages” and “cover” with their respective product part options in Page Part. In contrast, the Product-options (quantity, production time) are valid for the whole brochure, hence for the complete printing product.
The advantage of this configuration lies in the fact that all product part options only have to be created and entered once and at one point. After this, you can assign them to an arbitrary number of product parts. Should a term for a certain type of paper change, you only have to change it just once, and centrally. The changes will be applied to all products to which this paper is assigned. You can configure product part options under CloudLab – Page Options – Page Options. Here you choose your desired option (e.g. paper) and create a new option using the button “Add new Value”. The entered values are called attributes. Standard attributes, which can be found in every product part option, are Name and Code. Name refers to the option, Code is the unique identifier for the option, which is used to reference the option throughout the shop.
Additional fields for the configuration of weight and prices are explained in the chapter about Calculation (starting page 2.19).
Please, do not create any product part options exceeding these seven page parts and five products. Otherwise, articles that were created and published earlier can not be displayed in the shop anymore, because they can not process the newly added product part options. Should you wish or need to make changes in this section, please contact CloudLab support before doing so.
PRODUCT PART
Once you have configured all product part options, you can create the product part. Choose all settings relevant for your product. The configuration for the creation of product parts is located under CloudLab – Product Parts – Product Parts. Clicking “Add New Part“ will create a new product part. Name is the product part name, while the Code is used as unique identifier for the product part.
In the next steps, you can select all options needed for your product part by holding CTRL (CMD on Mac) or Shift while clicking them
SELECTION AND DENY RULES
In many print products you can combine properties in multiple ways. Paper type, number of pages, coloring, also in all those sections where you have assigned values to the respective product part options. However, for some product parts it can be useful to prohibit certain combinations in the selection matrix. A brochure of 300 pages would probably end up being way too bulky if printed on 300g/m² paper. Selection and deny rules allow you to exclude certain combinations already from the outset. This does not only work for certain product parts but also globally for the entire shop system.
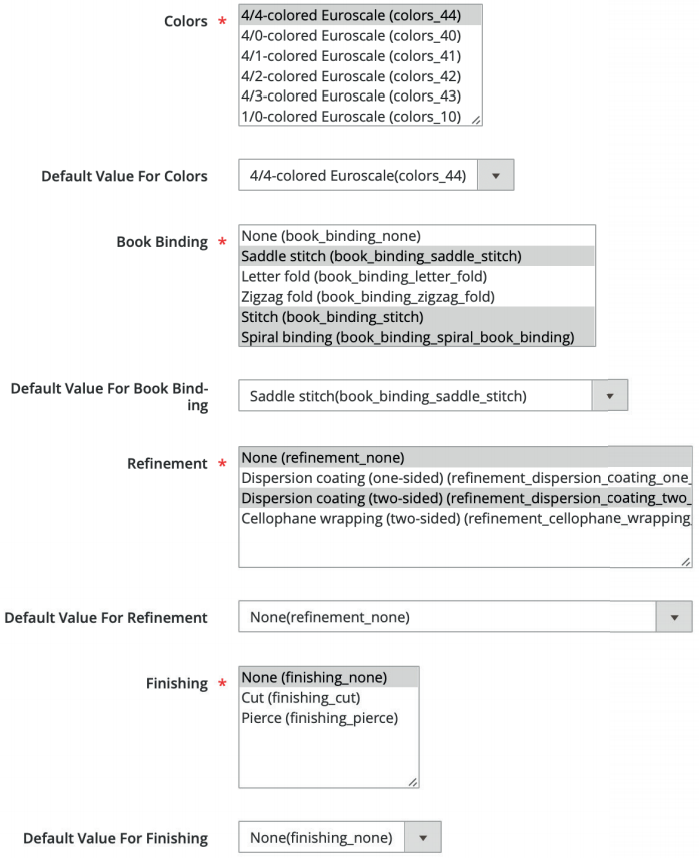
Let us stay with the example of the content pages of a brochure. In the product part view you will see one or more gray shaded fields in each of the product part options, which you can combine with each other. One possible combination for a print product would be, for example: 90 g/m² paper in DIN A4, 16 pages, no finishing.
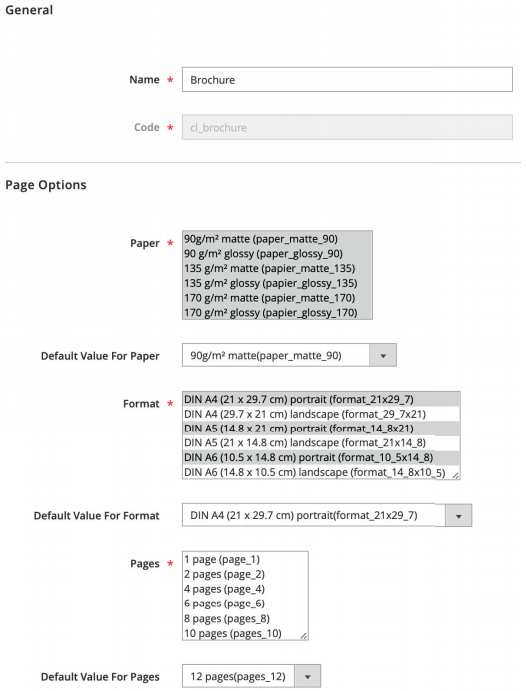
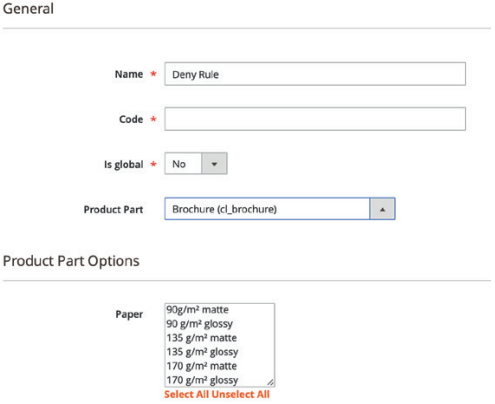
Deny Rules
To prohibit certain combinations, switch to the menu CloudLab – Rules for Product Parts – Deny rules and click Add New. Choose a name and code for the deny rule (the latter can only contain lower case letters, no umlauts, and underscore „_“ as the only permitted special character) and decide for which product part the deny rule shall be applied. Let‘s stick to our brochure here. If you wish for the list to globally be applied for all products, tick the box Is global.
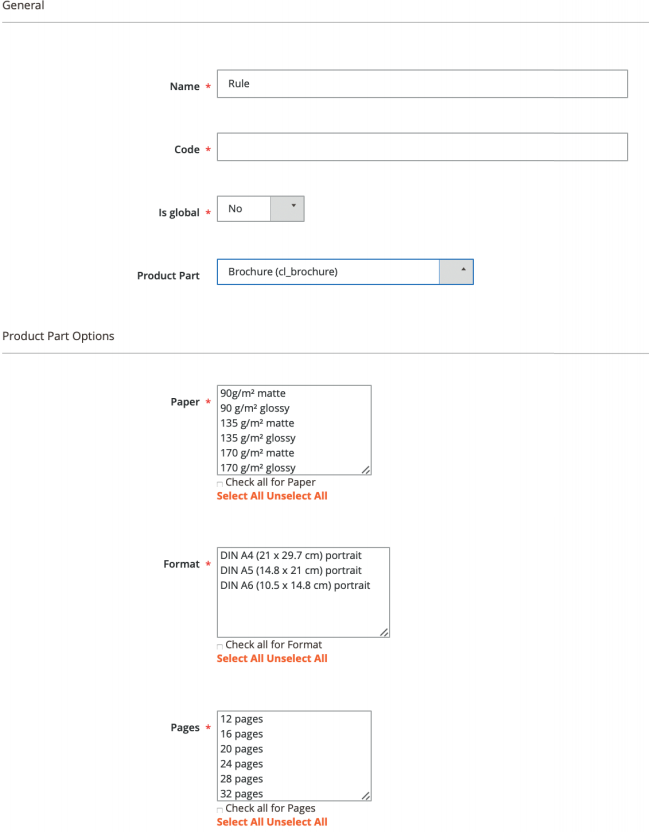
Based on the respective settings, you will then find dropdown menus under which you can set further conditions for the newly established deny rule.
Please note that if a project consists of more than 32 pages, it is not possible to select a paper thickness of more than 135g/ m2. To do this, select the options you want to forbid (hold CTRL/ CMD key and choose several options one after another). Here you can also add additional values from other product part options to the deny rules, for example you could prohibit the square format for print products of more than 32 pages. Save your deny rule by clicking on the „Save Deny Rule“ button on the upper right.
Selection Rules
Under CloudLab – Rules for Product Parts – Selection rules you should now configure the respective selection rule for the deny rule you just created, in the same way you created the deny rule above. Click „Add New“ and choose a name and a code for the selection rule list (the latter, too, can only contain lower case letters, no umlauts, and underscore “_” as the only permitted special character) and decide for which product parts the selection rule shall be applied. Following our product part example, select the same brochure as for the deny list.
Now choose all options, for which the deny rule shall be applied. Check the option “Mark All” under all non-relevant fields. In our example, click and mark all page numbers exceeding 32 pages in the field Pages to make the more heavy paper types unavailable for these. Select the appropriate new deny rule below and click “Save”. In the shop view, paper weights of more than 135g/m² will not be displayed anymore for products of more than 32 pages.
You can create as many deny and selection rules for one product and thus prohibit as many combinations as needed.
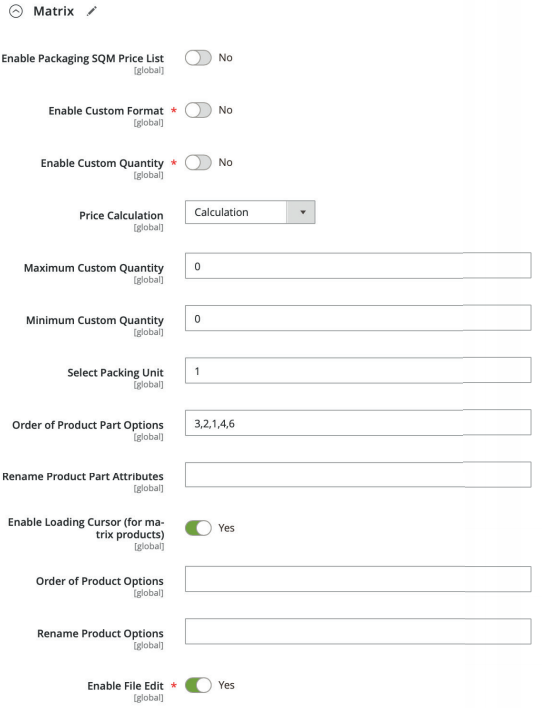
Please note: If you created a simple deny rule, as described in our example, it can be useful to display that characteristic, which defines your deny rule, first in the product view. Therefore, you should change the sorting order of the product part options under Catalog – Products and choose your brochure. Click on Web2print settings in the menu below and change the order of product part options under “Matrix” by rearranging the numbers separated by a comma.
In our example, we would put Pages (3) first, to make sure the system doesn‘t offer your customers a paper type which wouldn‘t be available later, should the desired number of pages exceed a certain value. If you put Pages first, prohibited paper weights will not be displayed in the following steps.

ADD THE PRINTQ PRODUCT TO THE MAGENTO CATALOG
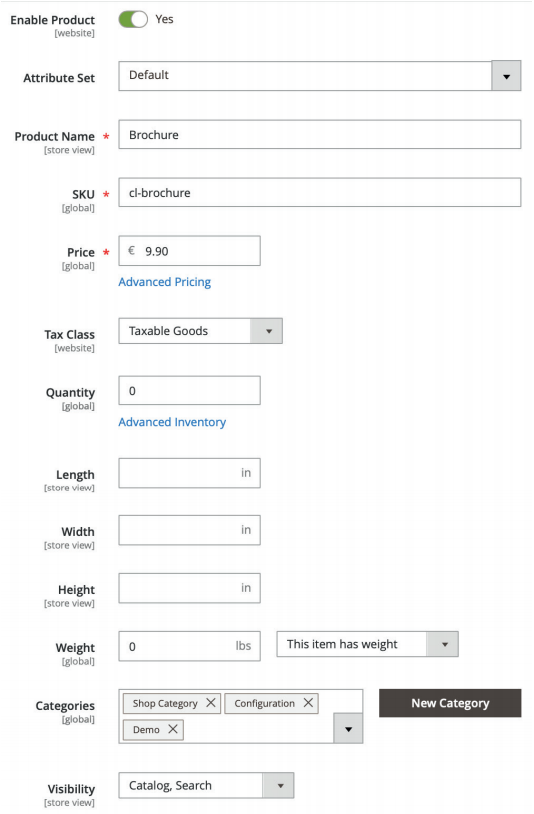
Basically you just repeat the same steps here, which you used to create a store product earlier. Here, too, begin by choosing the attribute set “Default” under Catalog - Products - Add New.
General
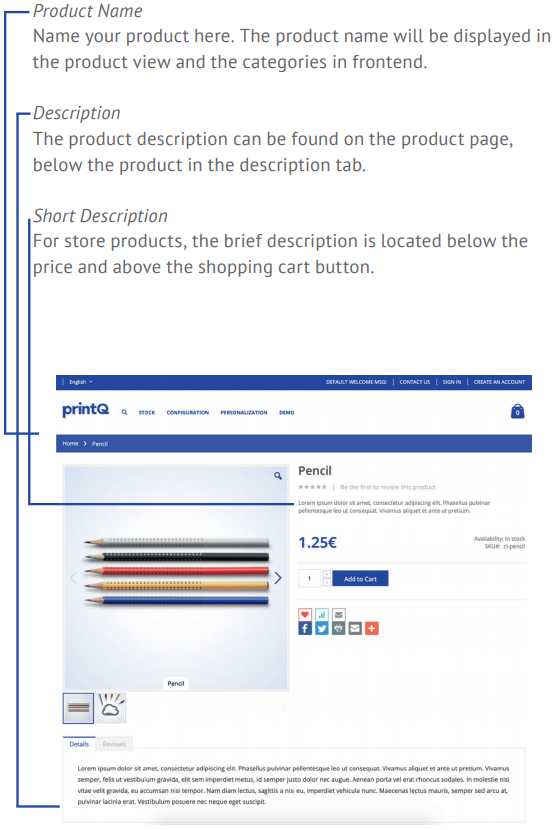
Product Name
Here you name your product. The product name is displayed in frontend in the product view and the categories.
Description
The product description can be found on the product page below the product in the Description tab.
Short Description
The short description for store products is located below the price and above the shopping cart button.
Article number/SKU
This is a unique alphanumeric number for the product within the shop system, which internally is also called SKU.
Weight
Enter the product weight in kilograms, with a decimal point as decimal separator. For a print product, the weight has to be set to the value 0. The product weight is calculated automatically, based on the product part options, paper weight, format, number of pages and quantity. Nothing has to be configured manually here.
Set Product as New From
Here you set from when to when the "New" banderole is placed over the article image.
Stock Status
Here you determine whether the product is in stock or not. Its display in the frontend can be (de-)activated via the box Enable Product.
URL Key
Can be found in the section Search Engine Optimization, is automatically set and defines the URL after the base URL.
Visibility
This setting defines, if and via which channel the product can be found in the shop: Catalog, search or both. Put Country of Manufacture and Delivery time in the respective fields.
Prices
Price
Defines the product price per unit. Enter the lowest possible price here. It is only used for display within the category. Final prices for print products are determined either via fixed price list or via calculation. This is explained in detail in the chapter about “Calculation“ (starting page 2.19).
Tax Class
Define the tax class for the article. In most cases, products will be taxed at the full tax percentage
Search Engine Optimization
Fill in these fields with all search engine relevant information. Compose descriptive product texts, using the most important keywords.
Pictures and Videos
Product pictures and product videos can be uploaded here. You can enter as many pictures and videos as you like. They will then be displayed in the shop view in the respective product area.
Web2print settings
The settings in Web2print settings are to be configured as follows:
Product Type: Upload + Full Page Configuration
Price Calculation: Fixed/Combined/Calculation
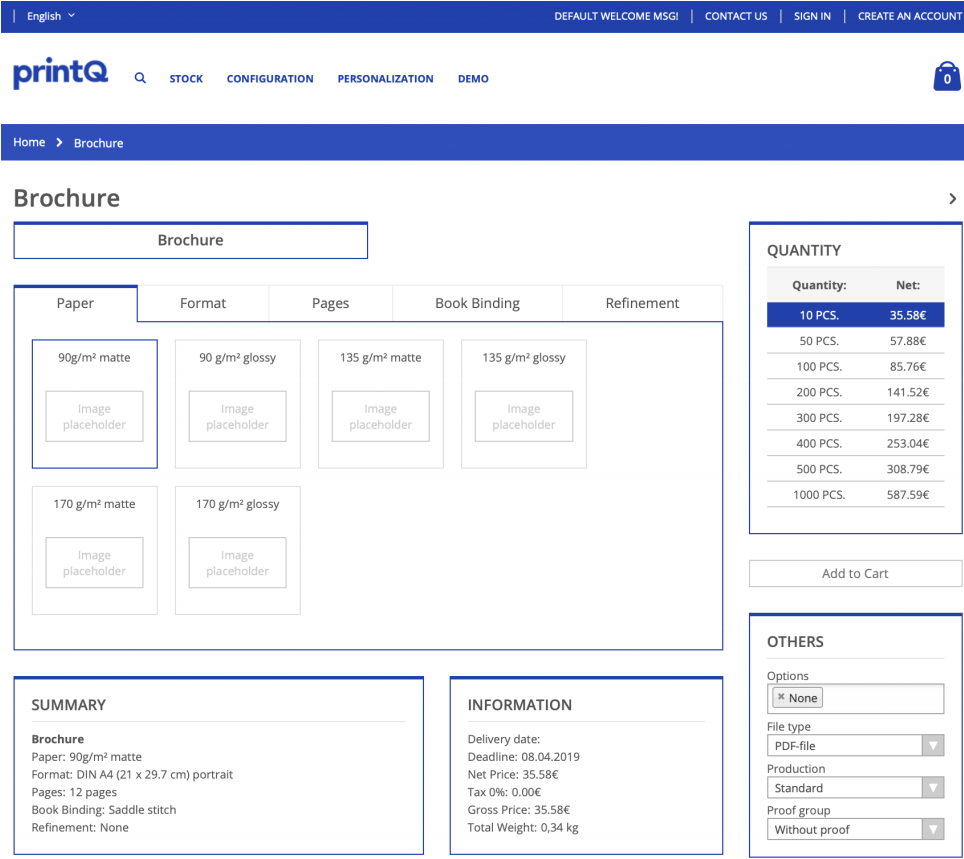
With this configuration the product is already displayed correctly, as you can see in the adjacent illustration.
Inventory
You can configure your warehouse management and stock via the pop-up menu that you find in Quantity. A product will only be displayed in frontend, if either Manage Stock is deactivated (setting: “no“) or the following conditions are met:
Quantity > 0
Stock Availability = In Stock
As print products are usually produced “on-demand”, stock management should be switched off.
Product in Websites
Here you have to define in which store on which website you want the product to appear. If you run more than one shop, one product can be displayed in one or several shops. If you do not make any choice here, the product will not be published.
Categories
The product must be assigned to a category to be displayed in the desired place in your shop. Please note that assigning a product to a category does not automatically add it to the superordinate category as well. You should always choose each category you want the product to appear in separately.
Related Products, Up-Sells, Cross-Sells
Magento provides you with valuable functions for additional sales. These are offered to customers on the following pages:
Related Products: Product Page
Up-Sells: Product Page
Cross-Sells: Shopping Cart
As Related Products, you offer your customers useful supplements to the current product. In the up-sells section you can suggest alternative articles of a higher quality or price, while cross-selling means displaying products, which are similar to those currently in the shopping cart, or which have been purchased by other customers together with the current products earlier. Assignment in backend is done by checkbox, similar to the categories. It is essential that the filter is set to “Any” (confirm changes by clicking on “Reset Filter”), because otherwise no selectable products will be displayed.
Print Product Setup
This is where you link the printQ-product part with the Magento-product. Choose the product part, which you configured earlier, under “Product Parts”. Additionally, you have to define the product options. Here, too, you can choose more than one option at a time by holding CTRL (CMD on a Mac) or Shift while selecting your options.
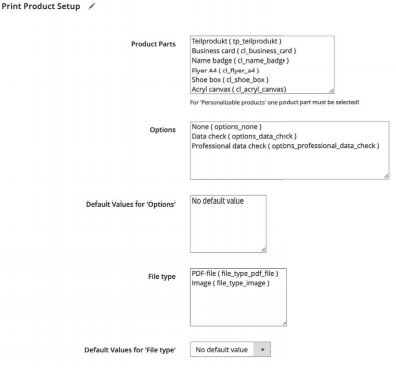
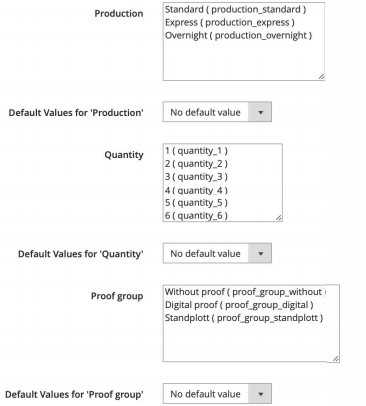
Once you save your product, it will be available in your shop:
