InDesign Export
CREATING PERSONALIZATION TEMPLATES WITH INDESIGN
In addition to the generation of personalization templates with PDFlib in Acrobat, it is also possible to upload InDesign documents as personalization templates. Importing the latter in printQ is possible without subsequent modifications in PDFlib. In the following paragraphs we will explain what you need to observe in this context.
The function of the InDesign import is compatible with InDesign documents of all current versions of the software for Windows and Mac. It is also important to know, that for a well-functioning personalization template not all InDesign functions can be used in the template, but only those which are also offered by PDFlib. For more detailed guidelines on PDFlib starting page 4.17 or contact our CloudLab support team.
Creating an InDesign template
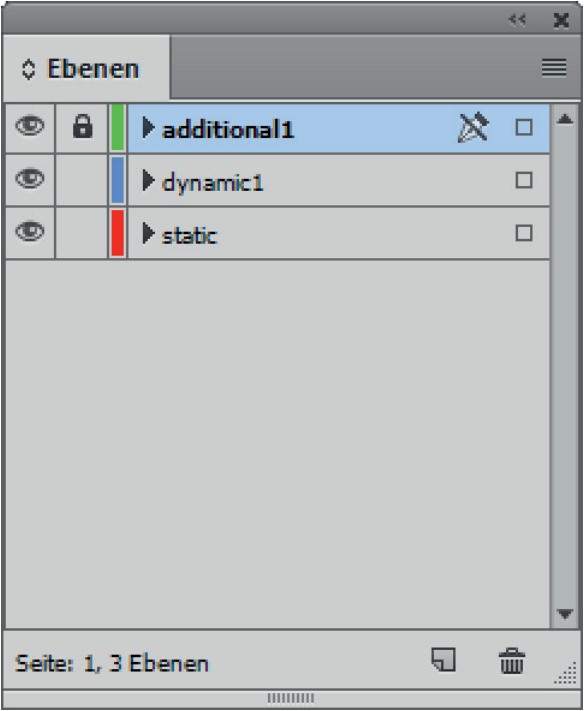
Creation of a personalization template starts with layers, which you define in your InDesign file. In order to export the template from InDesign, the different layers of the document have to be named in a certain way, by means of which printQ can derive their properties. There are three types of names for layers:

static – This is the level at the very bottom, which contains the background of your template. The customer can not modify it in the editor. This layer only exists once in your document and needs to be locked before export.
dynamic – In this type of layer, dynamic contents – modifiable fields like entry fields – are defined. You
can create an arbitrary number of these layers. They will then have to be named in a set order, for example dynamic1, dynamic2 and so on. Naming of the fields is done in the same way as in the direct setting via PDFlib in Acrobat. Please note, that text fields have paragraphs, and their lines need to be defined individually, in order to prevent PDFlib from accidentally copying incorrectly formatted texts. Other elements, like for example text alignment, are automatically taken care of by PDFlib.
additional – You can also place static layers above and between layers of the dynamic type with the name additional – for example ornaments for cards, which lie over text or images – as well as define their location and size. These, too, are to be named in a certain order, e.g. additional1, additional2 and so on. This layer needs to be blocked before export.
If you wish to include images in your InDesign document, these must be rectangular. You can not frame them with another InDesign shape.
Exporting InDesign templates
Once you have finished the document, you need to export it in a certain way in order to upload it. Create a new packaging for the document under File – Package… – Package… and save it.
Even now, packaging is not yet ready for printQ. Additional post-processing with a script is required, the installation file for which can be obtained from our CloudLab support.
Installation and functionality of the script

Select Window – Utilities – Scripts in the menu in order to install the script. A new window will open. Click the three dashes on the upper left and then Reveal in Explorer. Another window will open, in which you can select the installation file and drag it to the small InDesign script window.
Now the script, which you use to prepare InDesign packaging for upload in printQ is installed. It can also process several packages at once.
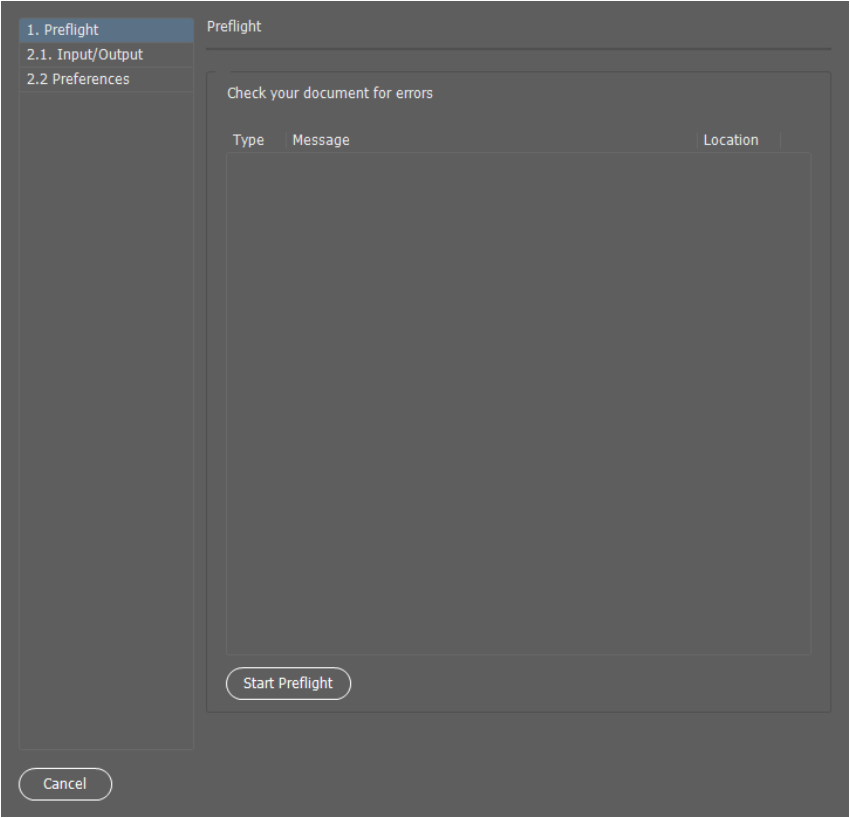
Double-click the script in the script window to run it. Three sections can be found here on the left: “Preflight“, “Input/ Output“ and “Preferences“ (Settings).

In the section “Preflight“ you can first verify that everything is in order in the dynamic sections of the InDesign template. Should this not be the case, a warning will be displayed, based on which you can then adjust your document. Next, under “Input/Output“ select the input folder with all templates that need to be converted. Subsequently, the desired target folder needs to be determined as the export folder. In the settings you can specify, for example, that a log file of the conversion shall be generated after editing, which will enable you to notice and identify potential errors. Furthermore, it is possible to change PDF settings. For example you can decide whether the crop marks or bleed marks should be kept and applied or not, set the desired image resolution, and more. If you want for a ZIP package to be created - which can then be used directly for the InDesign upload in Magento - you can select this option here by ticking the respective box. Click “Start” and the script will start to convert your templates.
Once the conversion is done, the packagings optimized for printQ can be found in the target folder – as a ZIP file if activated previously. Otherwise, the corresponding folder will contain several documents, including the individual layers in image or PDF format as well as thumbnail files, which via the product design will automatically be defined as preview images. You can still change them in backend later. In this case, however, you would have to manually convert the documents to a ZIP file before uploading them.
Uploading an InDesign template
To upload an InDesign template in Magento, click CloudLab – Personalization – Personalization Templates and then New on the upper right. Here you can define the product, with name, code and template type (here: form) and the known configuration options, see page 4.4.
To upload, click Upload PDF below and then Upload InDesign. Select the Zip file of the desired template and click Save And Continue on the upper right. Depending on the size of the file to be uploaded, this process may take a while.
Subsequently the template can be added to the catalog under Catalog – Products – Add Product as described starting page 2.8. Likewise, under Web2print settings select the product type personalization and under Print Product Setup set up the previously defined InDesign based template.
