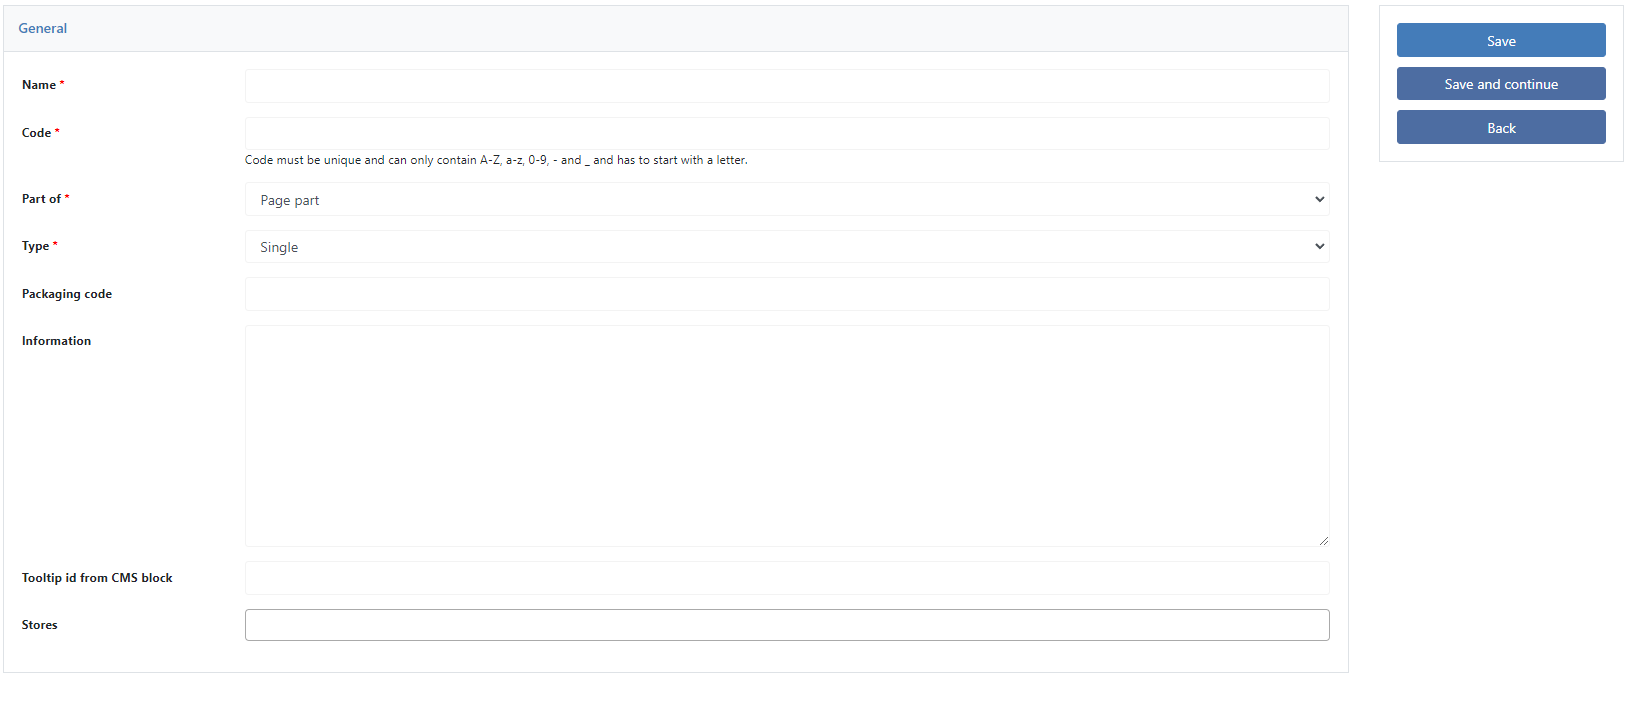
Create new page options
IMPORTANT! Since the page options are the basic building blocks of all products, you should always contact support before creating a new page option. Deleting page options afterwards is only possible via database!
page options can be created directly via the data center. Please note the correct order and that all partial products, web products and rules may have to be adjusted. Therefore, please go through these instructions step by step to avoid a negative impact on your system.
1. Create page option
When creating a page option, the following settings are available:

Name: Name of the page option. This can be changed subsequently at any time. The name is also available as an original string for translation into different languages. For this purpose, only the prefix "po_" must be written in front of the name within the translation file (.json).
Example: The page option is called "Printing method" and needs to be translated into German. So the line in the de_DE.json is: "po_printing method": "Druckverfahren".
Code: Internal code for the software. This cannot be changed subsequently.
Belong to: Select whether the page option should be assigned to the partial product or to the product.
Type:
Single: Only one value can be selected in the frontend.
Multiple: Multiple values can be selected in the frontend. This is only supported for page options that are assigned to the product.
Packaging code: This can be ignored
Information: Internal description of the page option without effect on the frontend.
CMS identifier for Tool Tip: Enter the identifier of your CMS block here. The content will then be output as Tool Tip for this page option.
Stores: Here you decide whether the page option is only visible to a specific store view within the data center.
2. Add Attributes

page options are created without attributes. This means that you have to add attributes yourself, such as a price field. These attributes, if they are price fields, must then be transferred to the formulas calculation files. For more information, see the Price Calculation section.
3. Add values

For all new page options, a "None" value is automatically created. This is composed of the name of the subproduct option and "None". In our example with the name "printing process" the value would be called "printing process None".
Further values can be added by you as desired and also deleted later.
4. Edit product parts, web products and mappings
The last step is to adjust the product parts, web products and mappings. The automatically generated value "None" has already been added to the product parts and mappings (when assigned to the product part) and the web product (when assigned to the product).
So you don't have to adjust all of them, but only the ones in which you want to use the new values from the new page option
5. Activate Store data

When you have completed all the previous points, you need to activate the storedata once again. To do this, simply click the link in the corresponding hint message.
