Connection to DVS - For Customer (vers. 6)
GENERAL
The customer needs to have a license for DVS to be allowed to use that. Please ask the customer to get in touch with:
Hans-Jürgen Becker
Also our development team need to connect customers instance with their credentials after the customer signed up with DVS.
HOW TO ACCESS
The packaging module can be accessed via our Datacenter.
The user can either go the way of the printQ settings in the Magento backend
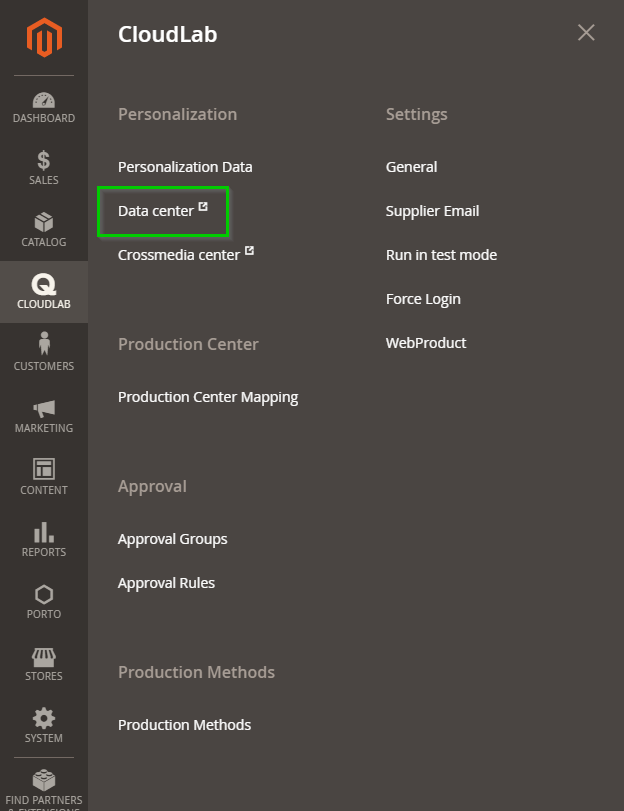
or via the following link:
https://{SYSTEM URL}/external/public/admin/login
In Data Center the Package Editor can be access by “Package Editor”
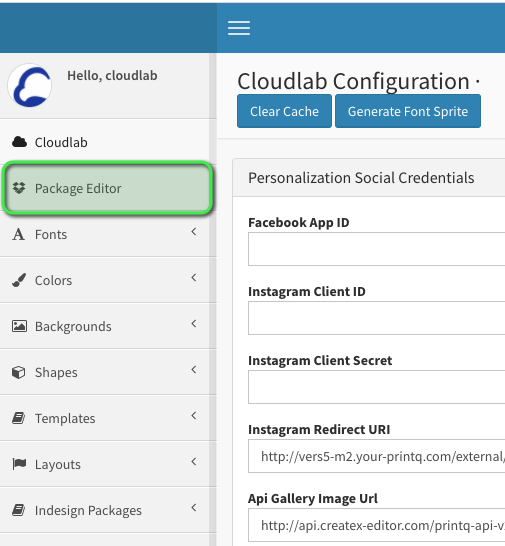
SET UP NEW PACKAGE FROM DVS CATALOG
To create a new product via DVS catalog, you must first create a corresponding box in the DVS online tool.
https://www.dvserp.de/mylogin/
The login credentials are provided by DVS.
Step 1 - select category
Select your desired category. Here you have 3 selections
Displays EN
Folding-carton
Corrugated-boxes
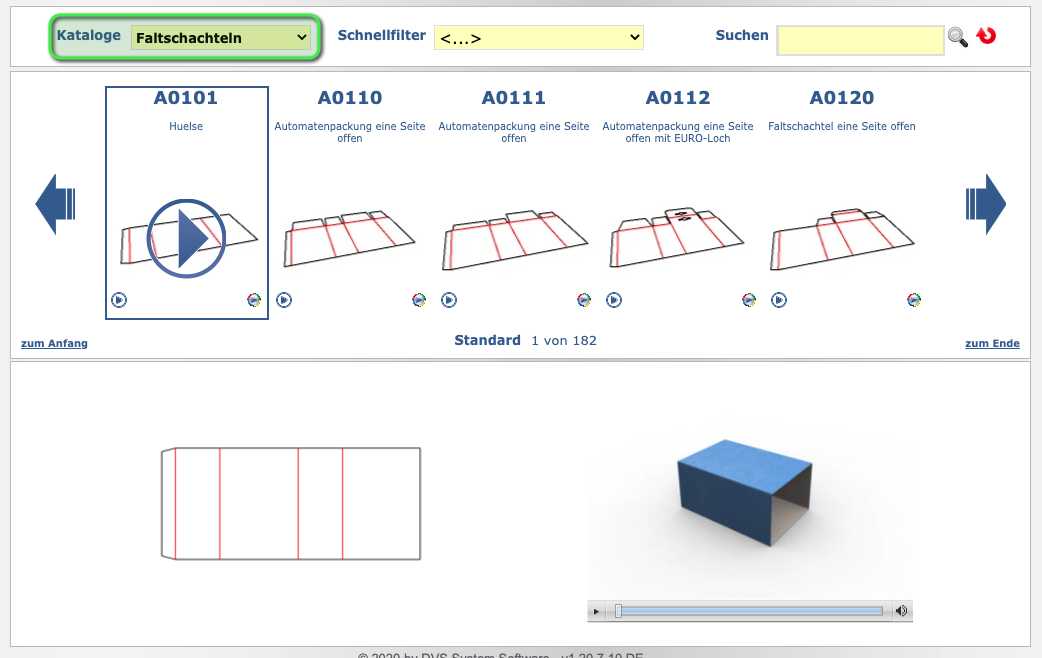
Alternatively you can go via the full page search in the upper right corner.
Step 2 - select the Box
Click on the “play” icon of your desired box
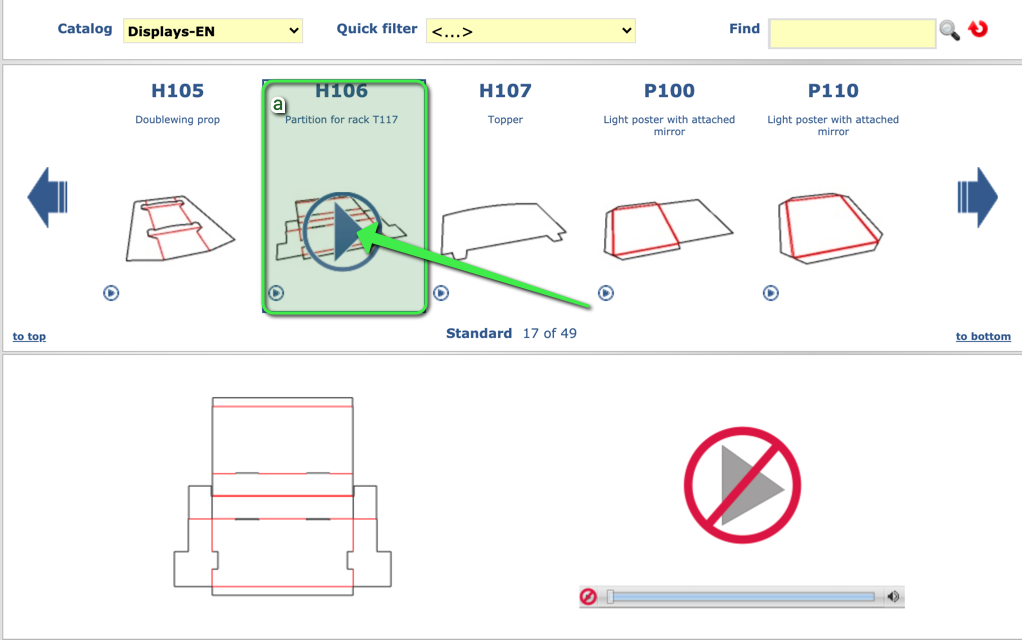
Step 3 - Configure Box in DVS
Now the user is guided through various questions. These questions ensure that the user gets the correct configuration of the selected box at the end. Once all questions are answered, you will be taken to an overview of the selected and configured box. Here the user has to enter a pre-configuration for a box. This configuration has no influence on the later box in printQ and is only used to create a configuration file.
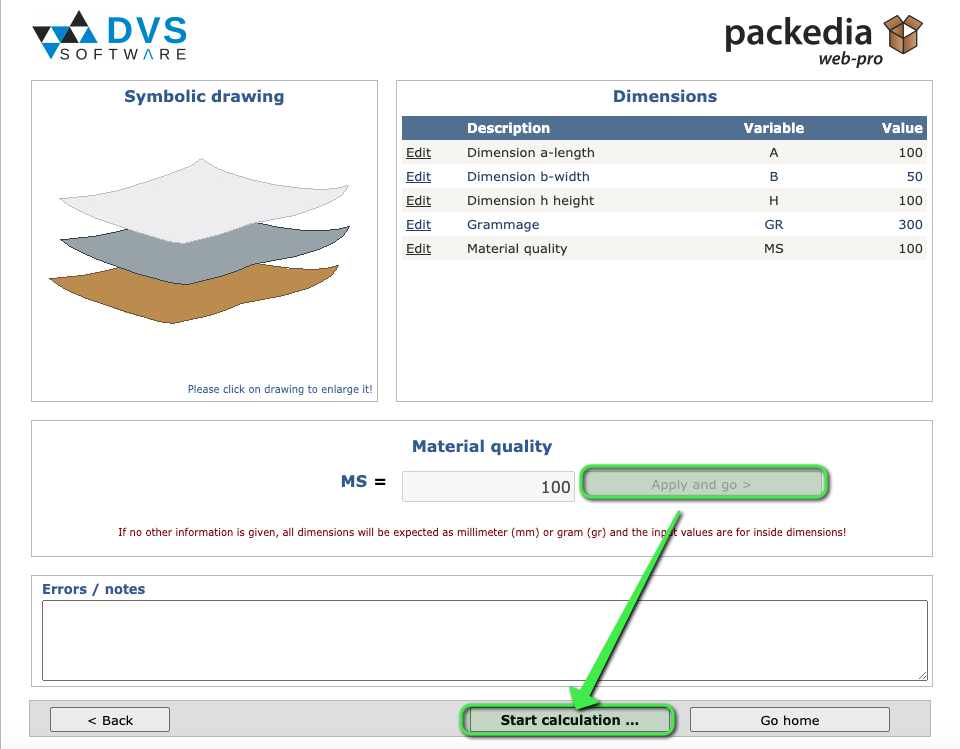
Step4 - Download File
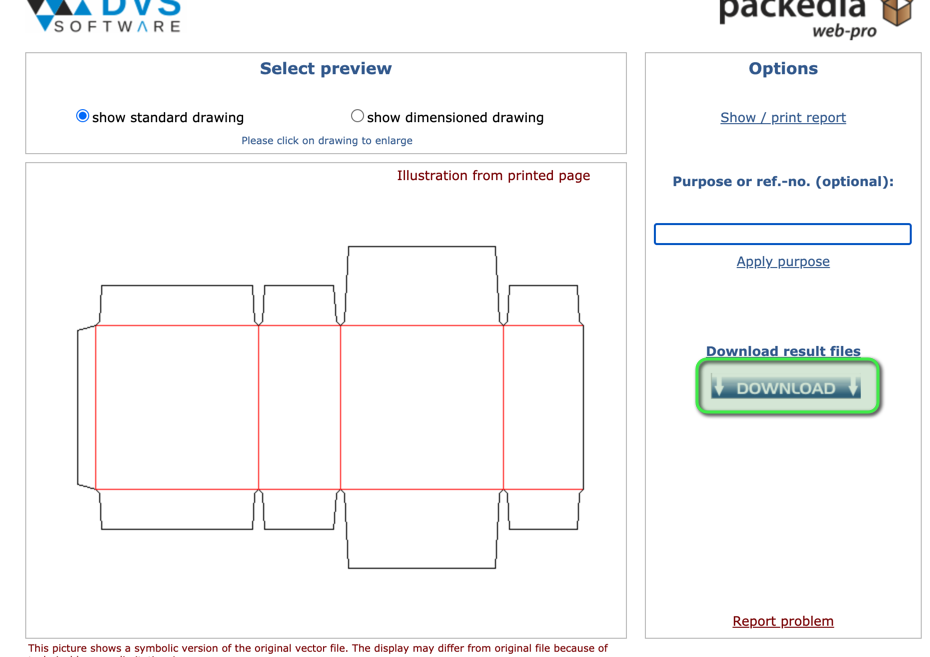
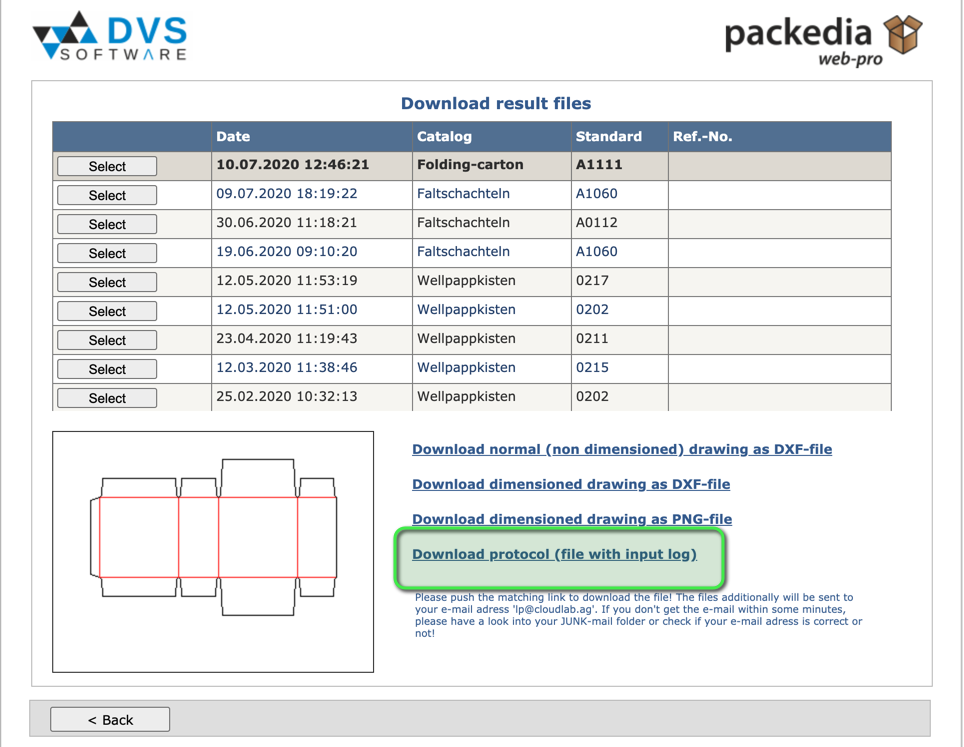
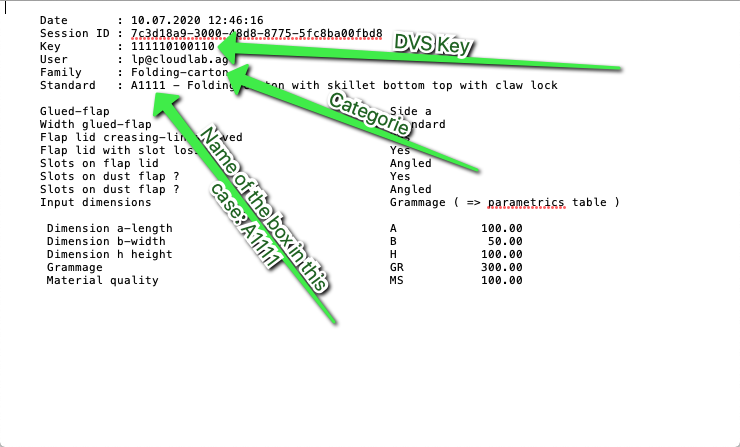
For our connection to DVS we need to have at least the:
DVS Key
The name of the box
The category
Step 5 - Insert Box into CloudLab WebCAD
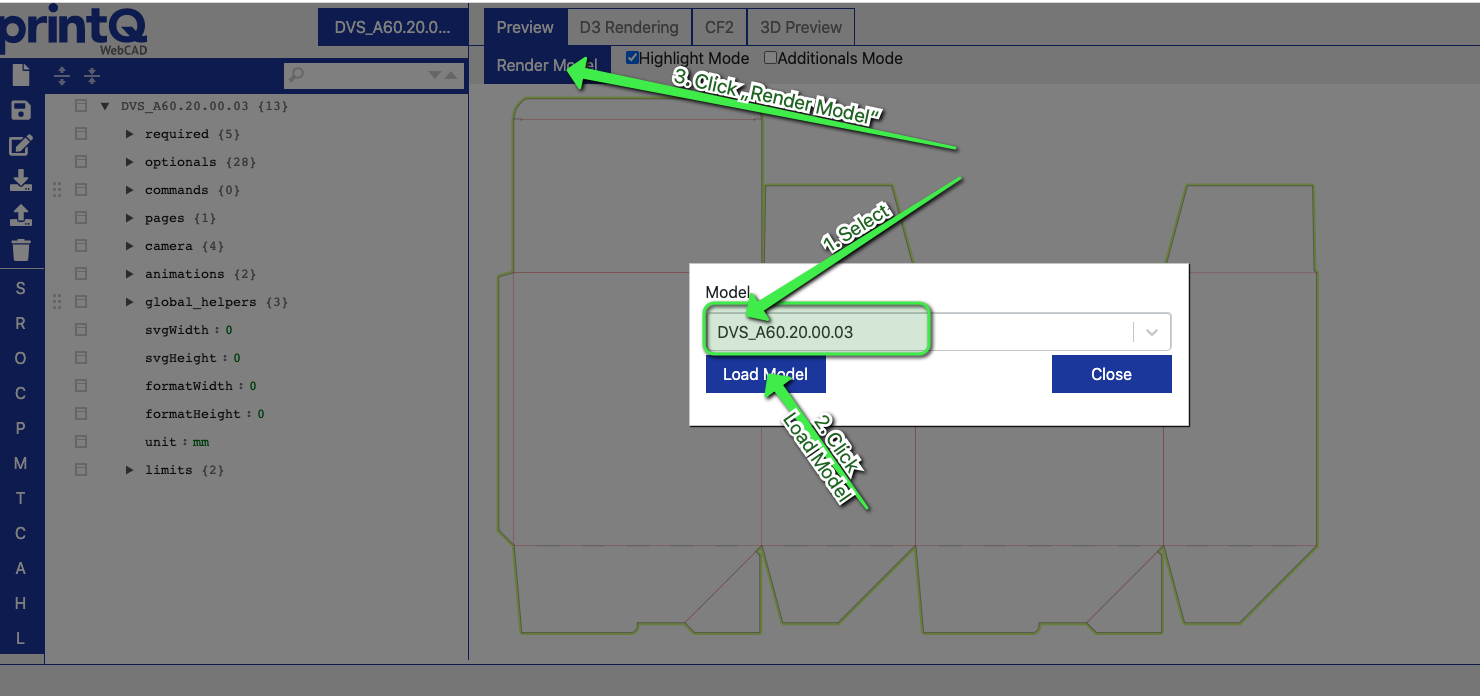
Open the CloudLab WebCAD as described above and select a Box with the prefix “dvs”. Then load and render the model like described in the screenshot below
Step 6 - enter details from the downloaded file
Change the Key, Category and name of the box according to the previously downloaded file. To change this, please go to the left-hand menu and open the “optionals” menu tree. Here you’ll find the options that need to changed in order to get the desired box.
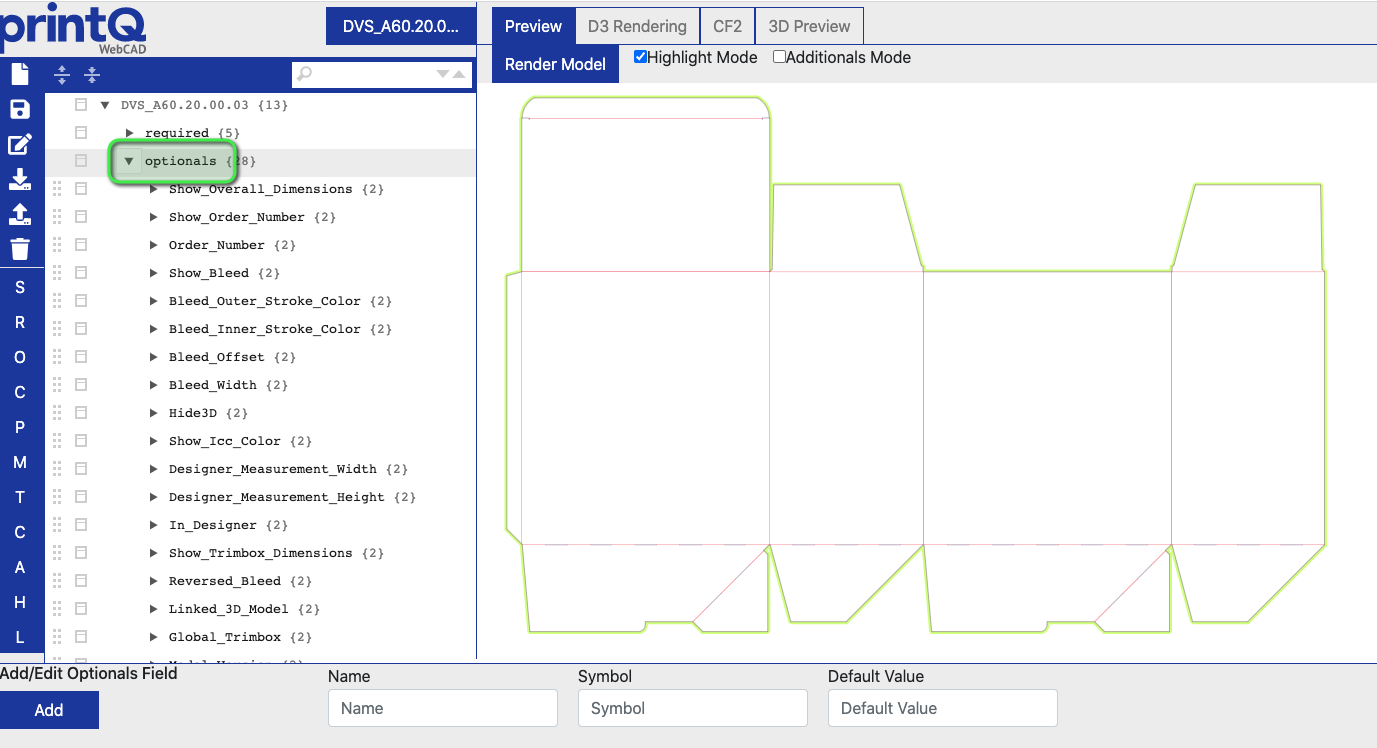
Please do the changes in the following items:
Linked_3D_Model
External_Key
External_Category

Step 7 - Check measure symbols
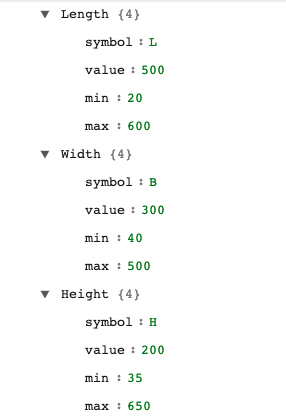
The Symbol is different per package. Corrugated packaging e.g. has LxBxH compared to folded packaging which has AxBxH.
You can check the dimension symbols in the downloadable file from DVS at the very bottom.
Step 8 - Check your Box
To check if your new Model is working please click on “Render Model”. If the new Box appears everything is fine and you can save the new box with “save as” with a new unique name. This name can be selected in the Magento product to make it visible in the frontend.
