Collective Invoice Function (vers. 6)
COLLECTIVE INVOICE
You can enable the Collective Invoice function on the shop level under CloudLab > Settings > Configuration > Collective Invoice Configuration (drop down menu on the upper left side: “Current Configuration Scope:“) individually for each of your shops.
As soon as this function is activated, the point Collective Invoice will appear in the menu Sales. At the end of each month a collective invoice is produced for each shop, which lists all invoices of the respective month and makes them available for download as PDF-files. You can design the PDF on the server level in the file
/html/templates/collective_invoice.phtml
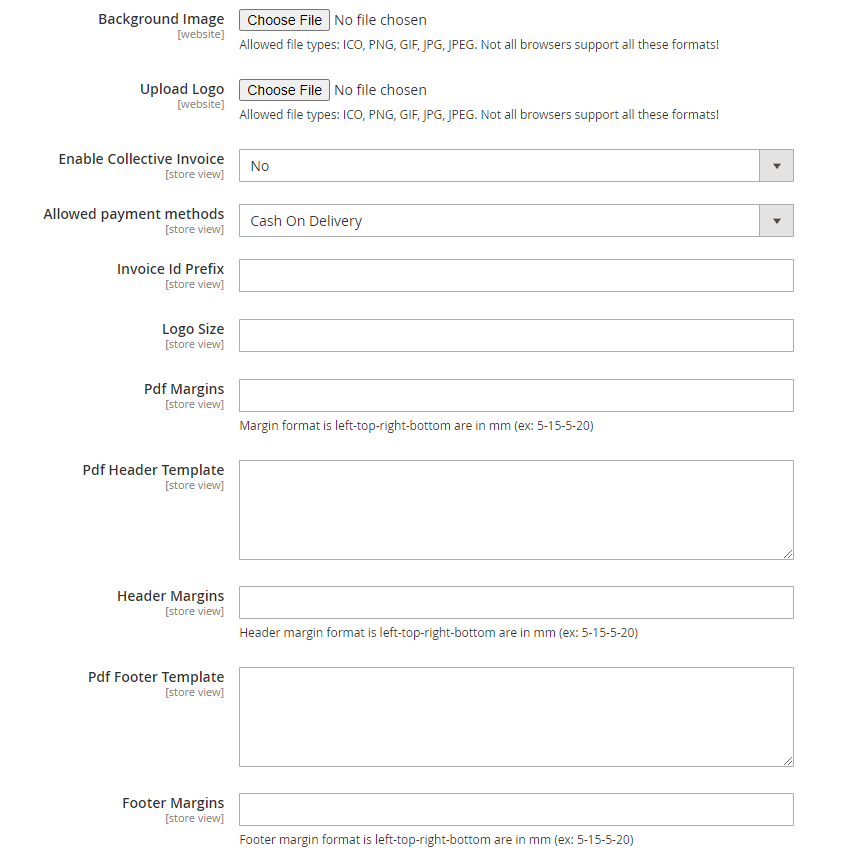
Some parts of the PDF template you can alternatively edit via the menu of the tab “Collective Invoice Configuration”. The menu provides the following options:
Background Image
Upload an image for the background of the PDF invoice here.
Upload Logo
Here you can upload a logo to be placed on the invoice.
Allowed payment methods
Here you define the payment method for the collective invoices in the selected shop (credit card, bank transfer etc.).
Invoice Id Prefix
Specifies the prefix with which the invoice numbering should begin.
Logo Size
Determines the size of the logo printed on the invoice, which can be uploaded above together with the background image.
Pdf Margins
Here you can set the lateral distance from the edge of the spreadsheet in millimeters (mm). Further below this is also possible for the distance of the header and footer.
Pdf Header
Template Here you can edit the header area of the PDF invoice formatted in HTML text.
Pdf Footer Template
Here you can edit the footer area of the PDF invoice formatted in HTML text.
The invoice function can also be assigned to individual customers. In order to do so, select a customer in the tab Customer and click Account Information on the left. Set the menu next to Enable Collective Invoice to “Yes” and click Save Customer on the upper right.

