Adjusting transactional E-Mails
Magento handles automated communication with your customers through transaction e-mails. These are generated under Marketing – Email Templates and assigned to the individual touch points in the configuration menu under Stores – Settings – Configuration – Sales – Sales Emails. They can be for example order confirmations, invoices or notifications concerning shipping and delivery. Every Magento standard system comes with a basic set of transaction e-mails in the set language.
These standard templates can of course not be individualized, which is why you should customize the basic templates to match your company‘s language. You can do this on the server side by modifying the respective e-mail templates under
\app\locale\de_DE\template\email
We do, however, not recommend this for reasons of upgrade security. These modifications should always be made via Magento backend.
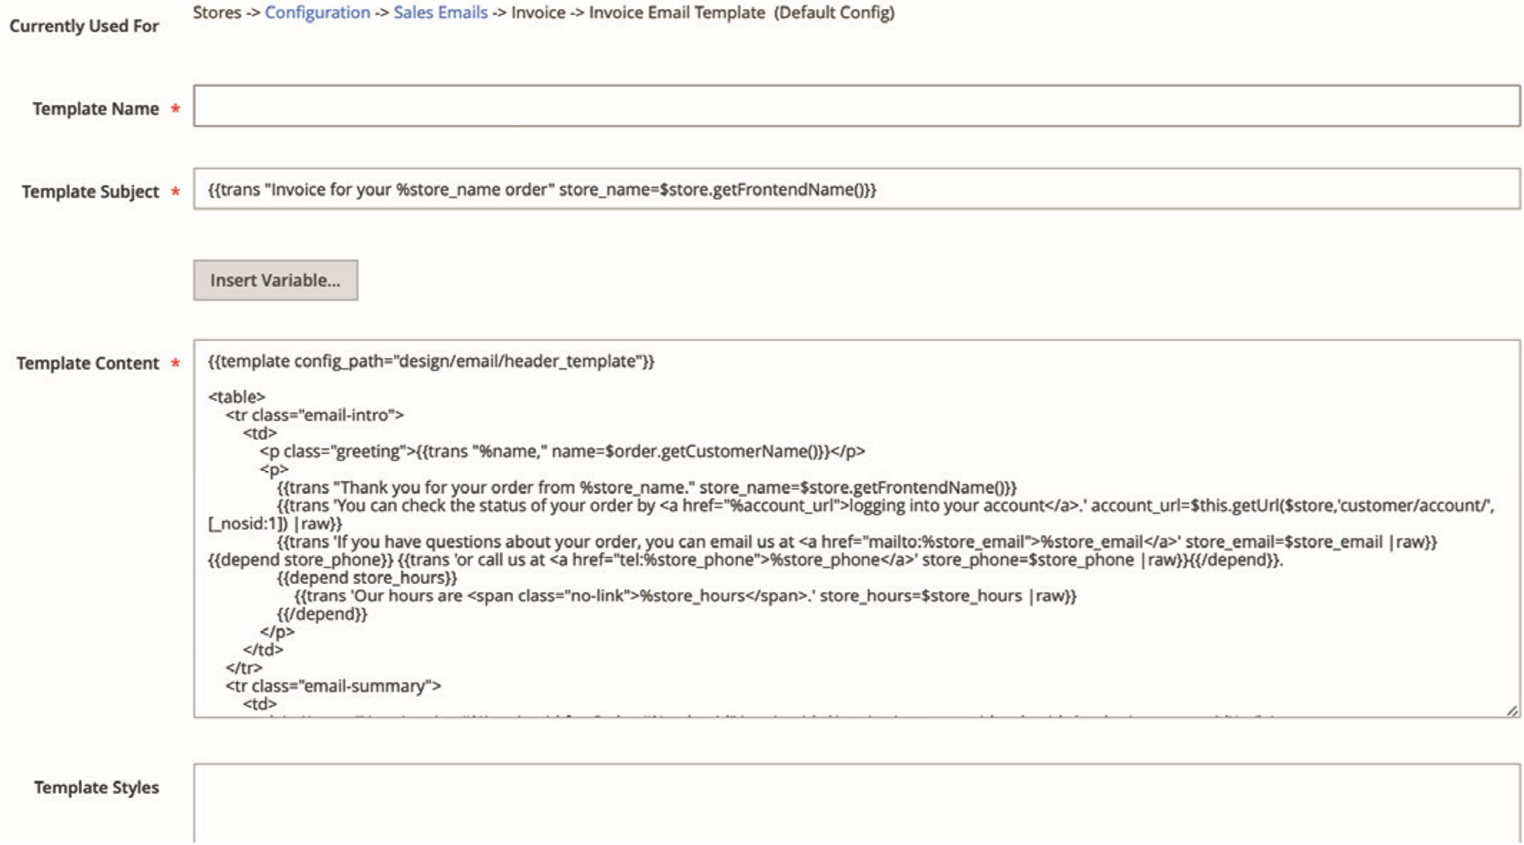
In order to create a template click New Template in the upper right and assign an unambiguous name. In the next step, you should load the standard template, here New Invoice, and click Load Template.

The previously blank fields are filled in with the template contents.
Template Information


HTML and CSS knowledge required, you can also make adjustments to the design beyond the pure text. If you want to change subject or template content, you can use the Add Variables button to load a predefined content with the correct syntax.
Once all modifications are done, you can save the template (button on the upper right).
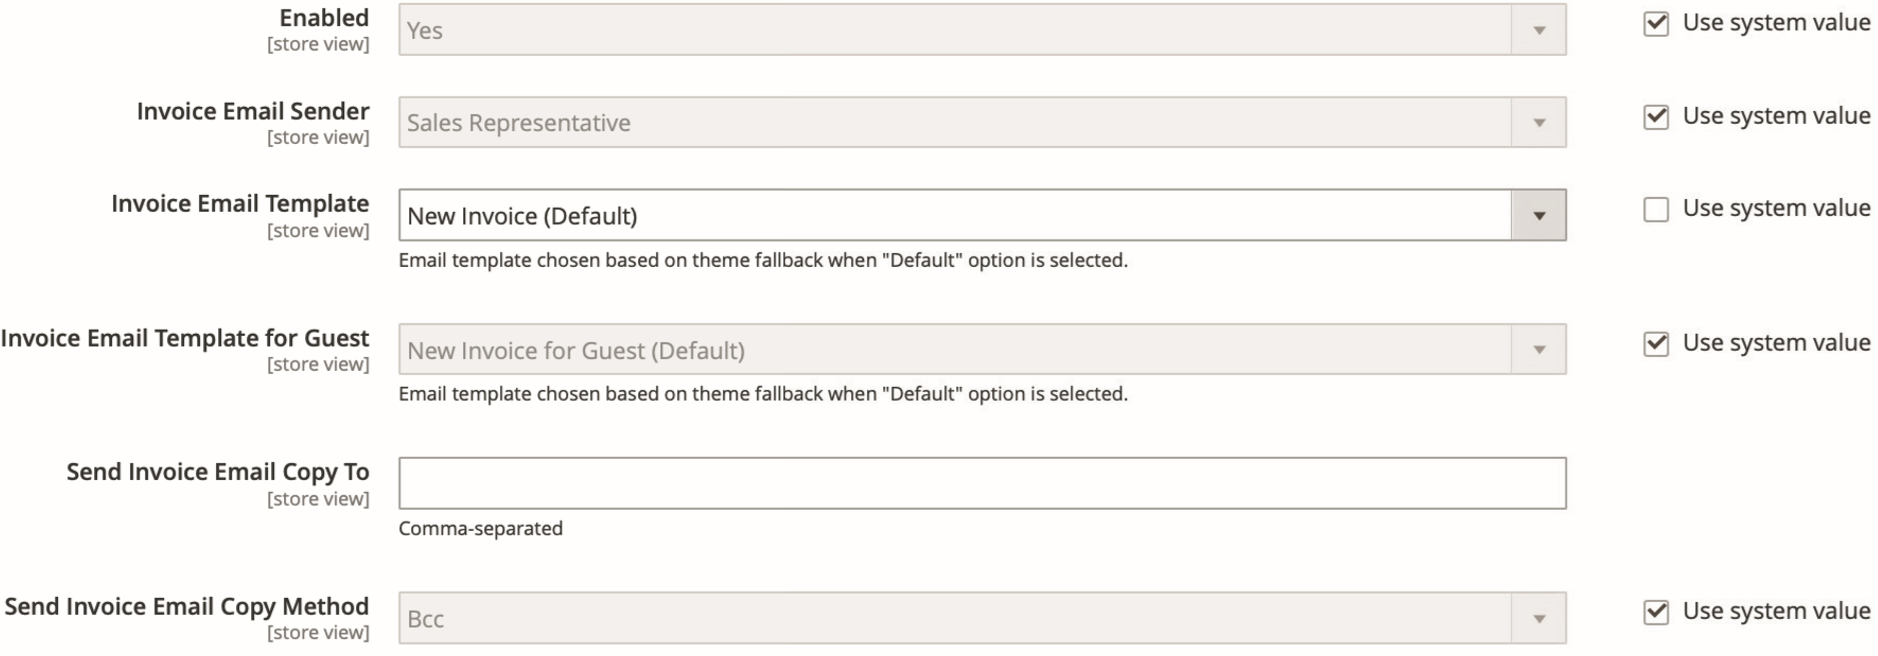
In the next step, the template is placed at the correct position in the system. Switch to Stores – Settings – Configuration and click on Sales Emails under Sales in the menu on the left.
In the tab Invoice (template assignments work just the same in the other sections) you can now assign your newly created template from the drop down menu to the Invoice Email Template.
Should your shop be multilingual, create your transaction e-Mails in all languages you use and assign them to their individual stores in the section Sales Emails by selecting them via the storeview (upper left).
Invoice

